At the moment (okay, I've been working on it for a while now) I am working on the last of the sculpting of a new creation, and so: this will be a very quick one.
I am hoping to use these roses as a sort of a prop in my latest sculpture, but I thought that because these are not like anything that I have shared before (unlike the sculptures), I'll do so now.

I knew that I wanted to have roses in this new piece, but, initially, I was going to try and use ribbon roses and spent the better part of the day trying different techniques to make them.
I even pulled out some of my embroidery books and had a look in there, but for what ever reason, it was just not looking the way I would have liked it to, so although I managed to make these ribbon roses, and they looked pretty good on their own, I had a really hard time putting them on 'stems'.
In the end, I decided to make them out of clay instead, and to be perfectly honest, I think that it might have been a really good thing as I doubt that I could have achieved the same results with the ribbon.
This is a handful of the ribbon ones...

Here's how I did it with the polymer clay...

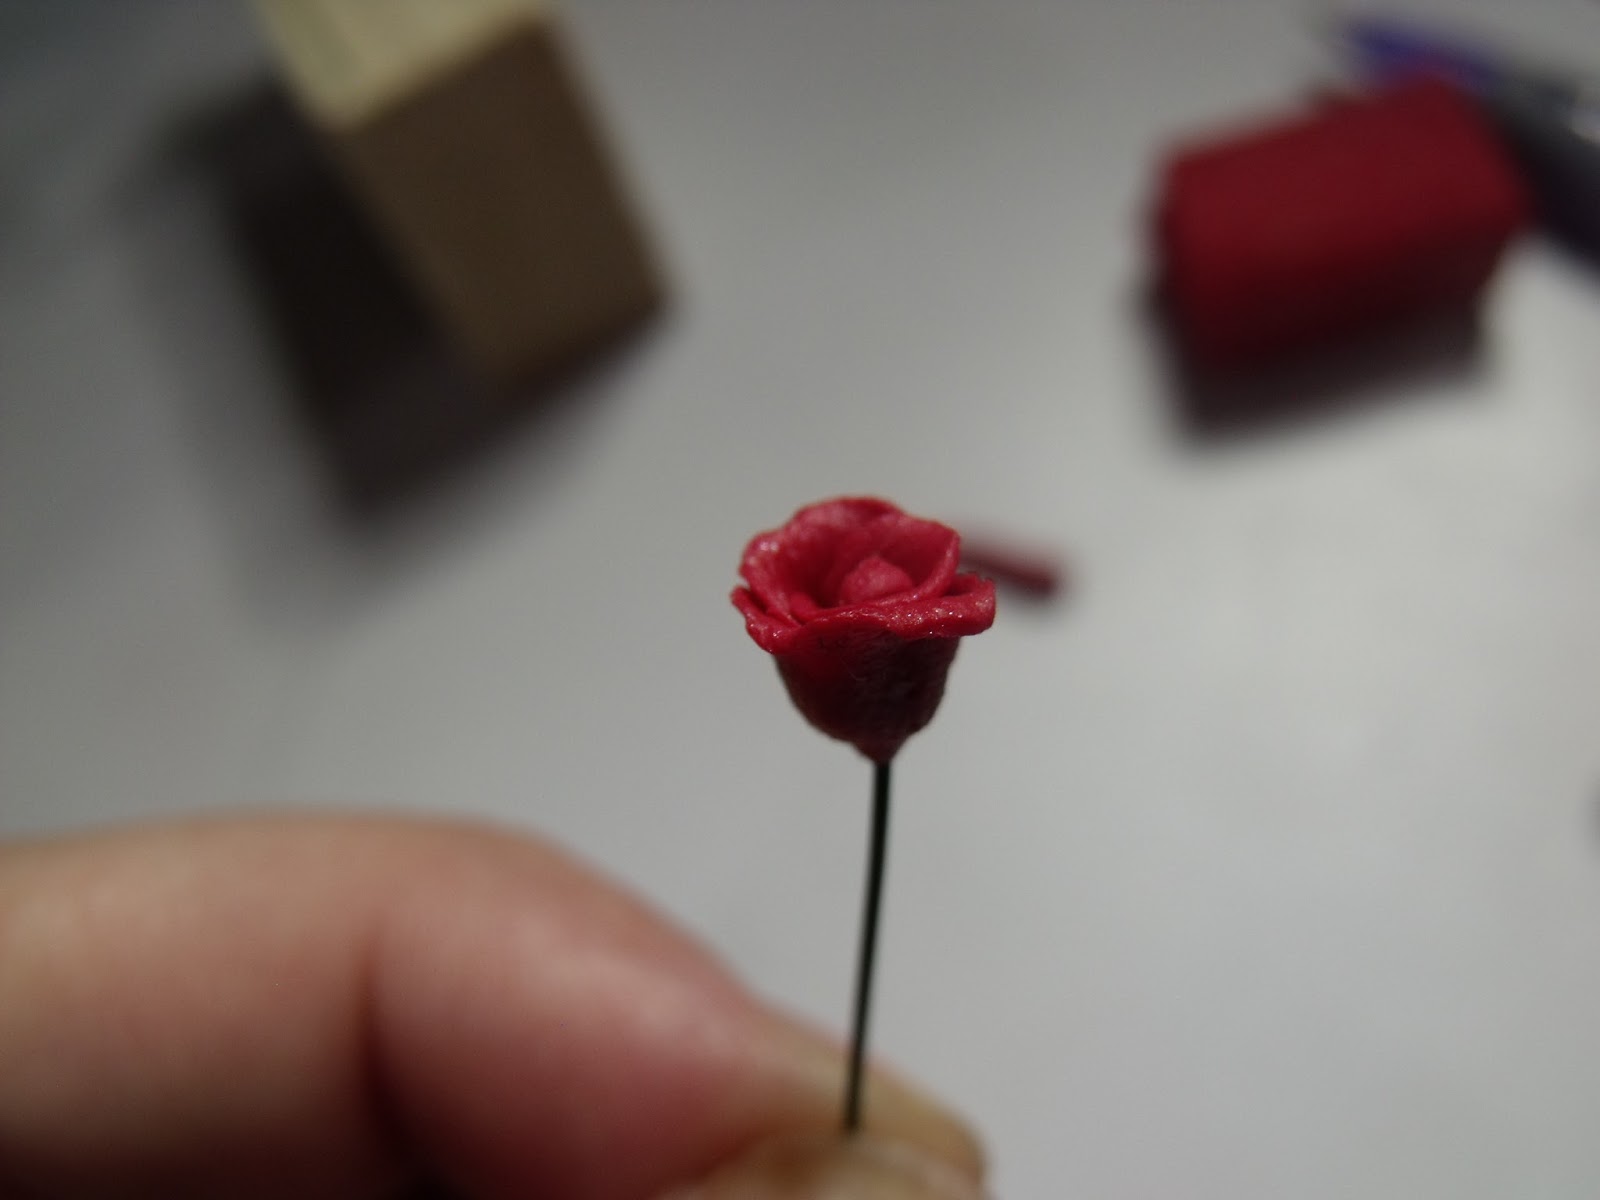
I started with a rolled snake of the red-blend (red mixed with a bit of mauve and some burnt sienna,) that I wanted these roses to be.
Next I cut the snake into small-ish slices. A quick note: if these are too thin it makes working with them rather difficult, and, if they are too thick, the petals tend to look a little fat. I would suggest playing with the thickness of these slices to find one that works for you.

I started the flower with a bit of clay baked on the tip of my stem which will serve as an anchor to the petals.
I used floral wire (painted green) as a stem for my flowers. The wire not only looks pretty good as a stem, but it also provides a nice 'handle' that makes it easier to work with the flower and not squish it. Another benefit of the wire is that it can be manipulated to have a few bends and twists etc. in it, again giving the flowers a bit more of a realistic look.

Remember those slices? Well I took them one at a time and flattened them in between my fingers until they were almost paper thin (the thinner you can get them, the more realistic the end result).
I found that as well as the thickness the shape is also rather important in obtaining a realistic looking rose. As always it might be a good idea to have some sort of reference on hand (either a real rose, or even just a picture of a rose and some individual petals). As you might be able to tell, my slice is no longer perfectly circular.

Once I am happy with the petal, I gently roll it around the pre-prepared stem. Next I carefully fold the top of the petal down just a little, effectively opening the bud. I must caution you: go gently because it is really easy to spoil them.
Now I simply continue adding petals until the rose is the size that I want it to be.
Some baking ensures that all of this stays perfect before we move on to the next bit.


It isn't really needed, but for added strength I just add a little drop of TLS (Translucent Liquid Sculpey) to the base of the completed rose just before baking.

Here I just made a little disc, similar to the ones I used for the petals and put it onto the stem.

A bit of cutting.

I find that if the cuts are too 'clean' the flowers start looking less and less realistic again. If the clay is sort of 'torn' rather than cut perfectly straight the result it much more satisfactory, that is if you are going for the more authentic look..

Adding a few bits and pieces (leaves and thorns) to the lower half of the stem.
Now off to a last bake in the oven, five minutes at 110 degrees Celsius should be more than enough for these guys.
And there you have it, six long stem roses. Perfect...


Now I am off to go and finish what I started, so:
Until next time,
ACL.
P.S. I just wanted to wish my Baby Brother the happiest of happy birthdays that has ever been had. I love you to the moon and back Bean. Always.
XOXO
No comments:
Post a Comment