Okay; so I really don't have much to show you in way of a new project, but I'll add a note or two on the eyes from the other day.
So I have been trying to make my sculptures a little more realistic, and one of the easiest ways to do that is to make the eyes a little more life-like. I know that it is, of course, possible to paint realistic eyes, but I find that, on the scale that I'm making them, it is too small for me to get it to a point where I am satisfied with the look of them, and maybe I am just too impatient and untalented with a brush.
My last post outlined my new approach to eyes, yes, but I still had a little experimenting to do before I was ready to show you how I 'finish' them.
I have taken the discs that I made and placed a tiny drop of resin on them to give them a domed appearance as well as a 'wet' look. Here's what I mean:

When I mentioned experimenting I was referring to not only the curing position and time but also it's resistance to heat (it is a real shame to go through all of this effort to make a perfect iris etc., sculpting a face and then having the eyes ruined when you bake the clay). Heat resistance was not something that I even really considered when I purchased my first lot of resin, I was more concerned with the clarity.
I went through all that effort , only to have them come out all milky white instead of clear after baking. I am not ashamed to admit that I cried a little.
I know its hard to see the severity of the discolouration in this photo, but these eyes became a complete write-off...

I also experimented a bit with the curing position; mounting the discs on pins and hanging them upside down, with the hopes that they would keep a better domed shape when fully set. This is a perfectly acceptable way to try and get to your endgame, however it can quickly become rather a bit of a challenge to get the exact right amount of resin on the 'eyeball'. Too much and the drip is too long, making the eye misshapen and too little and the effect is equally devastating.
Next you would have to consider the position on the disc. If the resin's 'drip' is slightly off center, that is to say that the peak of the dome is not directly over the pupil, it also looks horrid.
Another problem I ran into with this method was the difficulty involved with 1) keeping them perfectly still and hanging upside down while they cure and 2) ensuring that there were no bubbles trapped in the resin. Even the tiniest bubble can ruin the look of the eyes as everything is magnified by the resin.
All in all not how I recommend doing it, not unless it works for you...
And so, having gone through a fair few trial and error processes, and having invested in some different resin, I set out to try again.
The most reliable way I found to cure them (letting them dry) was to simply have them sitting in a dish that you don't mind destroying (I use mini foil pie dishes from the cheap shop). This way the resin can easily be inspected for bubbles, and the dish can be moved safely out of harms way without compromising the integrity of your hard work.
I should caution you not to entirely submerge the disc, but rather to use the point of a toothpick to drop tiny amounts onto them.
Finally I would suggest that you leave them to cure, out of harm's way - I cover mine to prevent dust and/or hair getting in them - for at the very least a full day before attempting to remove them from the dish or even just touching them.
My final tip would be to, naturally, follow all the instructions on the resin that you might be using, but also not to expose them to excessive temperatures for as long as possible, perhaps using the time between making and fully setting to work either on the body or the setting etc.. The one that I am using recommends that you wait at least a week.
As always however I would most strongly recommend that you find a way that works for you!
Here are a few more pictures:
 |
| The resin I used so successfully. |
 |
| My foil dish with some eyes drying/curing... |
 |
| A selection of ready-to-use eyes. |
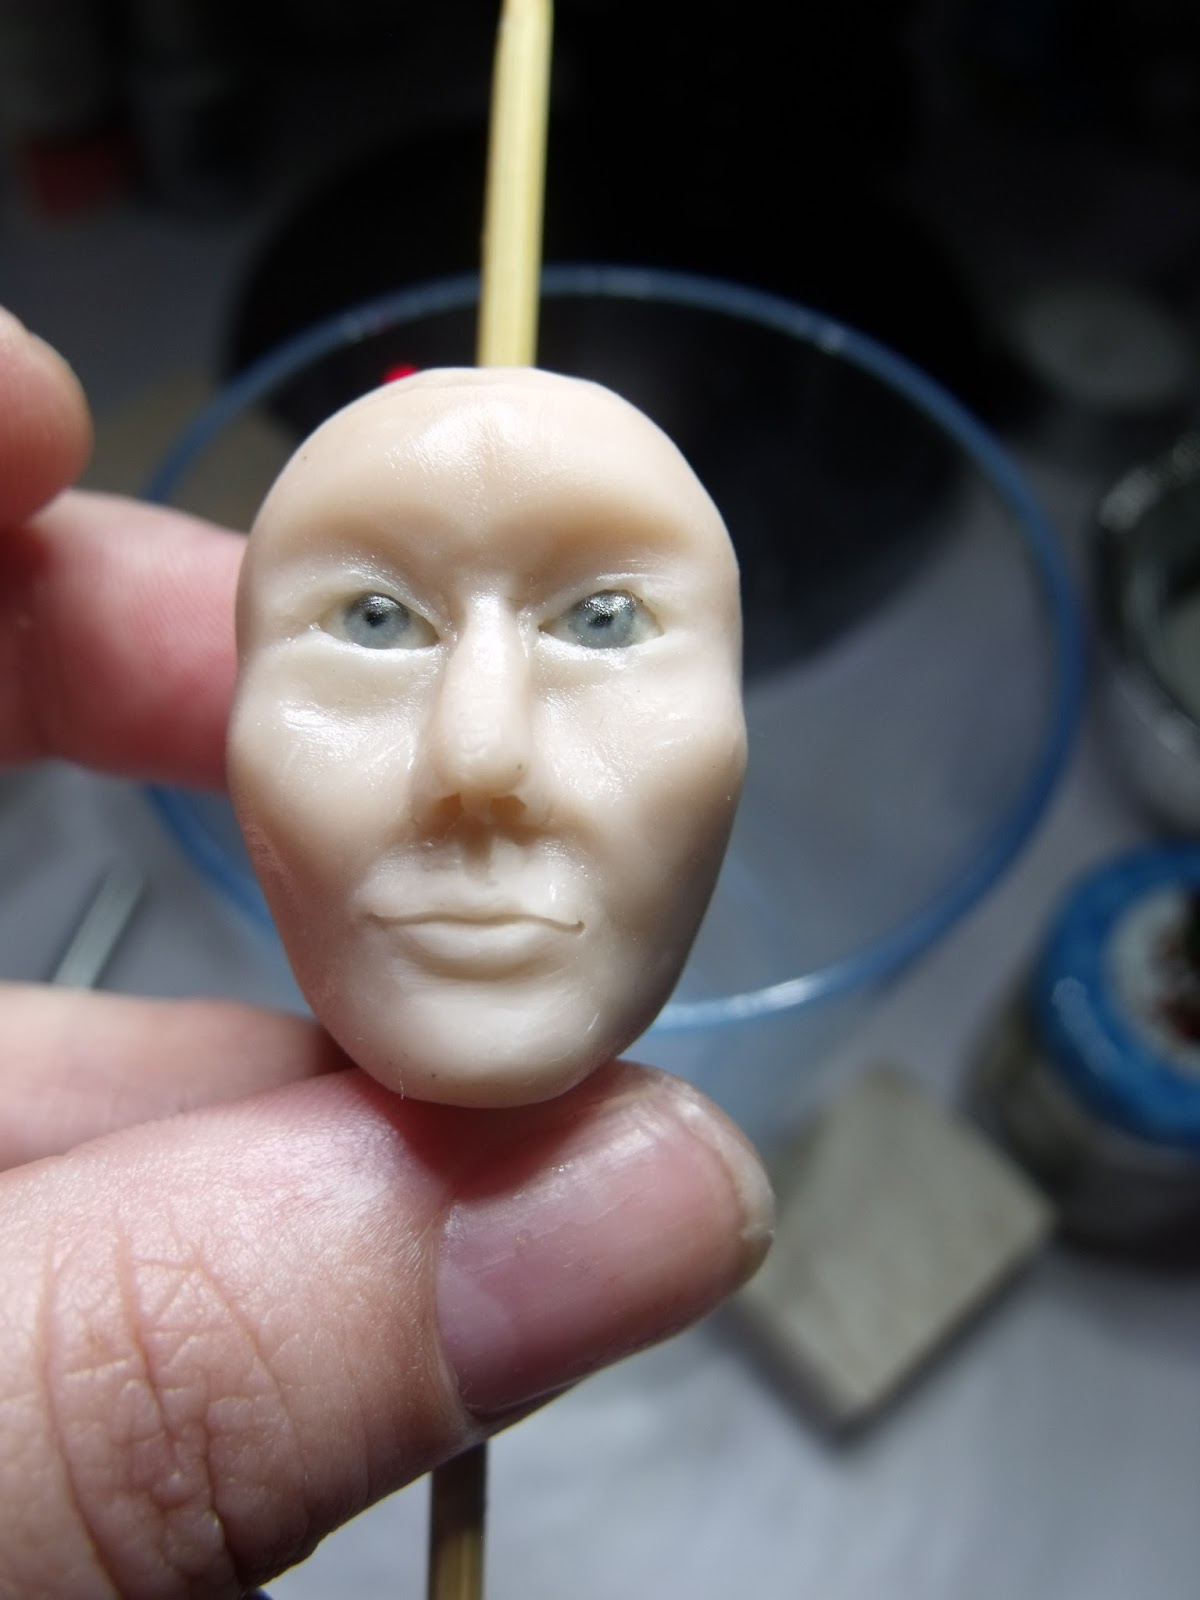

The face above has been baked and re-baked and there appears to be no change in the eyes at all (insert a little happy dance here).
 |
| In a different light. |
 |
| And, finally: a side view. |
Well that's it for another day.
Until next time,
ACL.
No comments:
Post a Comment