Hello Internet Peeps!
I thought that I might show you how I made these little breakfast plates.
I won't call this an English (or any other nationality for that matter) Breakfast, instead I will call this one Kyle's Breakfast as this is exactly the type of meal that would make my hubby's heart go all a flutter. It consists of two fried eggs - sunny side up, crispy bacon, fried tomato, two sausages, some fried mushrooms, baked beans (in tomato sauce), and of course, toast.
Wow, seeing it all spelled out like that, it sounds super big and also really fattening and filling (not in this size though ;P).
Let's get going:
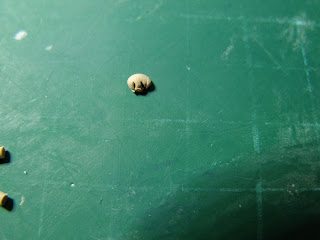
For the baked beans as well as the mushrooms I used the same tan coloured clay and rolled out a thin snake.
For the beans, I cut tiny little bits, and rolled them into bean shapes. They don't have to be perfect, as at the end of the process they will be submerged in 'tomato sauce'. Before that, however, I baked them and set them aside to cool.
Once my beans were cool I took some of the Kato Liquid Polyclay and coloured it with powdered pastels.
Here you can see the colours that I used to get the right shade of red for my 'tomato sauce'. Once the colour was mixed in, I added the hardened beans and set this aside until I was ready to plate-up.
Because the beans are pre-baked, there is no chance of them being liquefied in the KLP, but I would advise that you wait to mix this until you need it as hair and dust can get trapped in the liquid clay and make a mess.
With the mushrooms, I cut slightly larger pieces and again rolled them into balls.
I flattened the balls and made three little cuts, to about the center.
To make the mushroom, I simply rounded out the inside of the cuts on either side of the middle 'stem' or 'stipe'.
Once they were all shaped, I added a little definition by making a slight depression just under the cap where the stipe terminates.
I also used my trusty soft pastels and a wet paintbrush to put a tiny bit of colour in the same spot. Once that was done I baked them and set them aside along with my 'beans'.
Keep in mind that it matters very little if there is a variation from one 'mushroom slice' to another.
The sausage was pretty straight forward. I used a bit of the clay that I had left over from the boerewors that I made in my Summer Braai Project.
I rolled out little snakes, textured them with my toothbrush and gave them a slight curve. Like the other pasts of my brekkie thus far, I baked the 'sausages' and set them aside as well.
The next thing I made was the bacon. Now this was the first thing
(and possibly the only) in this particular project that was tricky.
I srarted with a variety of brown and umber clays mixed through with bits of translucent clay.
I rolled all of the clay into snakes and arranged them like in the photo.
I rolled this out and folded it in half.
I forget the exact amount of times I did this - folding it and rolling it out and repeating, but I basically did it until I was happy with the blend.
Now for the tricky but. I rolled my bacon out into a relatively thick sheet, about 5mm thick, and then started to stretch the clay, being careful to do it slowly and controlling the clay so that it doesn't tear.
I pulled it and stretched it until it was about the right with for the bacon I wanted and only then tore off bits. Tearing makes the edges rougher than cutting, giving it a more realistic look.
I added texture, once again using my tooth brush, but I also used my dotting tool, to make some untextured streals in the lighter parts of my 'bacon'.
For the rind, or the fatty but, what ever you like to call it, I took some tan coloured clay and mixed in an equal amount of translucent. I rolled the resulting clay out into a snake, flattened said snake with my roller and attached it to the top of my bacon.
In hindsight, I could have done this before adding texture as I then needed to texture it all again, but never mind.
For that crispy look, I simply curled and twisted the bacon at random and baked them.
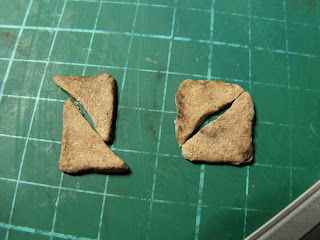
Toast is another easy one. Some bread coloured clay rolled into relatively thick sheet and cut into squares.
Add some definition by rounding off the corners, and indenting the sides. For the texture I once again used my toothbrush (might I suggest making sure that there isn't any left-overs from the last clay that you textured as it can transfer - you might have noticed the green spot on the top of thins slice of 'bread').
I cut the bread slices in two triangles and added some colour using my soft pastels again.
(The picture I took of the egg-whites was terrible, so I left it lout, sorry.)
For the eggs I used a slightly off white clay and, from a thin sheet, made a rough "fried egg" shape. I flattened the edges of said shape and added the yolk. The yolk consists of mustard yellow mixed with translucent.
I tried to blend the yolks and the white together slightly without distorting the general shape of the yolks. I found that it was really tricky and I always ended up with tool marks on either the white or the yellow clay.
To solve this issue, I used one of my new favorite products, Kato's Clear Liquid Polyclay (KLP). Whilst I had the KLP on the eggs, I added some 'cracked pepper' but taking some pre-baked black clay (I used a piece from a failed sculpt). I chopped the hard clay up into tiny pieces and sprinkled some into the liquid clay. The eggs were the only thing that I DIDN'T bake before plating up as I wanted them to conform to the shape of my plates. I also coloured the edges of the eggs with a bit of my soft pastel again.
The tomatoes I used came from the tomato cane that I made with the hamburgers in a previous post. Here is the link if you are interested: http://whatsannadoingtoday.blogspot.com.au/2016/07/hungry-well-this-wont-help1.html
Now to put it all together.
I started by coating the bottom of the plate with some TLS (Translucent Liquid Sculpey).
Eggs first. I made sure that the clay took the shape of the plate.
Adding the sausage and bacon.
Now the toast.
I poured/scooped on the baked beans in its sauce, and put the tomato and mushrooms in said sauce.
And there you have it. (Just quickly: as I didn't cover the tomato in this post, I will add that after texturing the inside with my needle tool, I also added some 'scorch marks' around the edges of it, once again, using my soft pastels.
All done. Into the oven for a final bake and voilà!
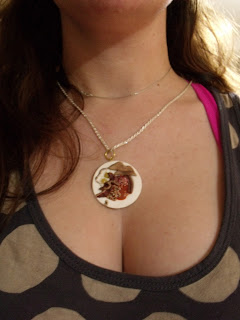
As you can see I have added a little loop to the back of the plates and so these can now be used as pendants or whatever. Here is how I wore it:
I hope that you have as much fun making Kyle's Breakfast as I have.
Until next time,
ACL.
Until next time,
ACL.


No comments:
Post a Comment