

Together they make quite a cute pair:

The other thing that I managed to do was make that guide to creating more realistic looking eyes. A quick disclaimer here: I took bits and pieces from all over the web to try and find a method that works for me. I suggest that rather than trying to copy these step by step, find your own way, something that works well for you.
Here we go...

(A good idea would be to find a picture of the eyes that you would like to try and replicate and match the colours of your clay with that...)
I started with about nine different shades of clay, ranging from dark to light with one of them being a complementary shade to the range of colour. For example in the blue eye there is a turquoise, in the green there is a shade of blue, and - finally - in the brown, a shade of olive.
I forgot to get some pics of the green one, but I do have one to show the colour range.


Arrange them in the order you would like, starting at the pupil and ending at the outer edge of the iris. Once you are happy with the arrangement, simply roll them out with either a pasta maker (if you have one) or, as I do, with a rolling pin.
You should end up with something like this...


What I do here is cut the ends off and then cut into four equal parts.

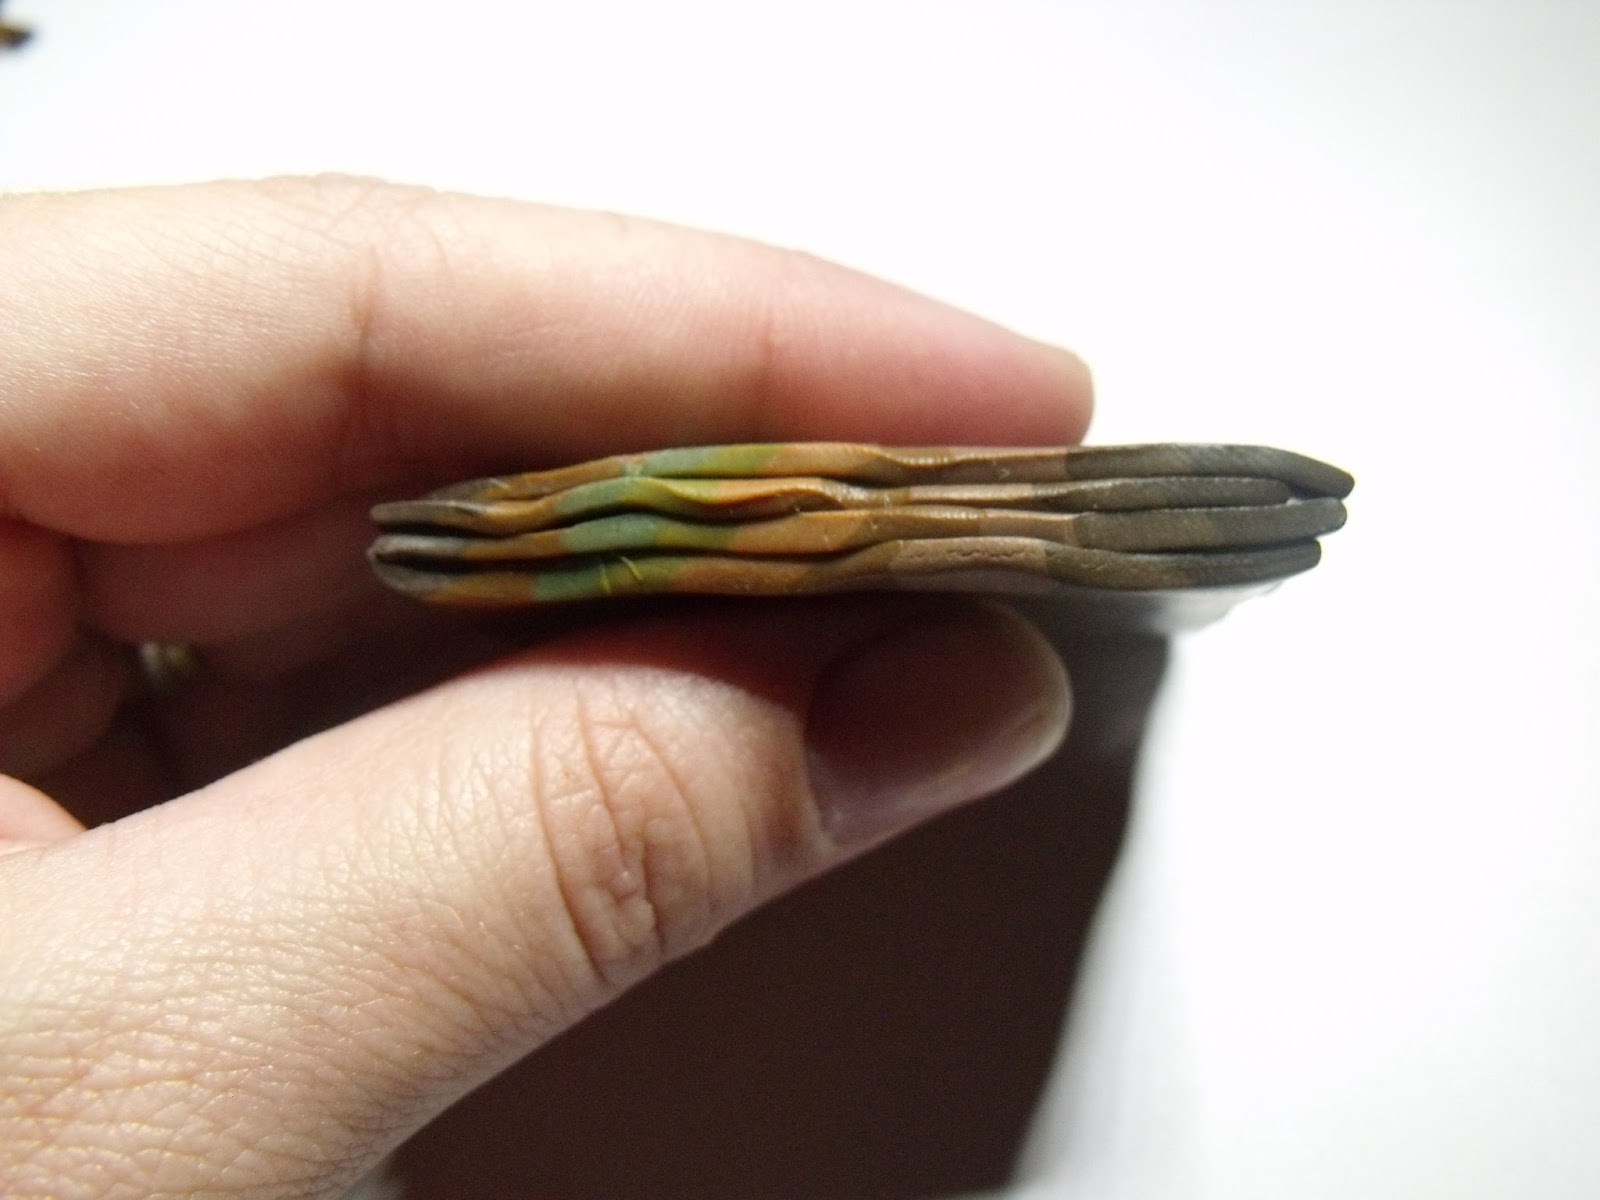
Stack these on top of one another, not quite aligned but rather staggered slightly. This is really hard to try and photograph, but here is a side view:
Grab the rolling pin and roll it out again, not too flat mind you, just enough to make sure that they stay stuck together and also that there is no air bubbles trapped in between the layers.
Once I am satisfied that it is done I cut off the ends, cutting it in half and stacking them on top of one another, only this time they can be placed directly on top of one another.


Here's the side view.
More flattening with the rolling pin, again not too much.
Cutting the ends off again and dividing into four equal pieces.

Stack them like this, but leave the rolling pin. Now it's up to the fingers only. The idea is to stretch this out carefully. It is essential to keep the 'top' facing up - that is to say the side with the straight lines that has been facing up the whole time. If you make a mistake here, and yes: I speak form experience, it can quickly turn into an unmitigated disaster.
Try and stretch it equally and if you can, don't pull excessively on any one part.

Once stretched out to the length that you are are happy with, slightly squash the one side, forming a triangle (the part you want closest to the pupil should be the one that is squashed), cut the one end off, and then cut into pieces about 1.5 cm long (remember to discard the last bit).

(These pieces don't exactly have to be 1.5 cm, they can be any length, just so long as they are all uniform in size.)


(Almost done.) Get some black clay for the pupil and roll into a snake the approximate diameter of the pupil that you want.
Now simply stack these coloured strips around the pupil ending up with something like this:


(Getting close to the end.) This next part can be deceptively difficult, control is the key. You'll want to now roll this into a snake or - rather cane - the same thickness as the diameter of the eye that you want. Please remember to thin it out evenly as you go and not to thin it out to the smallest in the middle right away even this seems to be the easiest. (Again speaking from experience.)
Cutting the cane in half every so often helps you to manage it as it gets longer.

(The finer details tend to get a little lost the smaller you go, so keep that in mind when deciding how small you want to go.)
Once you reach the desired width, slice a couple of thin slices and place on your baking surface and ensure that they are as close to perfectly round as possible. Bake as directed by the manufacturer.

Now all that is needed is sclera - the whites of the eyes. A tip for this is that the sclera is not necessarily pure/snow white, and if you use pure white, the face tends to look a little scary... So I have mostly white ball of clay that is mixed through with a bit of blue, pink, red and translucent, just to dull the brightness of the white.
I have seen plenty of tuts etc out there in which some of the artists use round eyes, or make these on glass head pins, and I did try to, but all I managed to make was a mess...
So instead I make discs.
Make a ball of white, squish it and put the iris in the middle. Bake again.

And there you have it!
 |
| These are the ones that I used in "Beautiful At Any Age". |
Well that is how I do it anyway. Hope this helps...
Until next time,
ACL.
No comments:
Post a Comment