I'm back again!
This one has turned out so well, I really like it. Between this one and the cookies, (http://whatsannadoingtoday.blogspot.com.au/2016/07/mini-food-baking-chocolate-chip-cookies.html) its hard to tell which is my favorite...
Anyway, let's get stuck into it...


Right, let's start with the brownie tray...

Sorry for the bad pic, but this is a bit of scrap clay that I shaped into the rough size and shape of the baking tray that I had in mind.
I baked the template and let it cool before moving on to the next part.

When my template was ready to be used I rolled out a thin sheet of pearl white clay (I love the sparkles in it), and placed it over the top. (Pro tip: dusting the template with cornflour/baby powder ensures that the clay wont stick to it...)

When I trimmed down the excess along the sides, I traced out and left the handles on the tray. You could always put them on after, and honestly I would recommend it, but that is not what I did... DON'T remove the clay from the template, but bake the whole piece as is. This helps the tray keep it's shape. I also recommend leaving it bottom up during the baking process too, this is because the clay softens and sort of melts a little before curing in the baking process.
Now the star of the show...

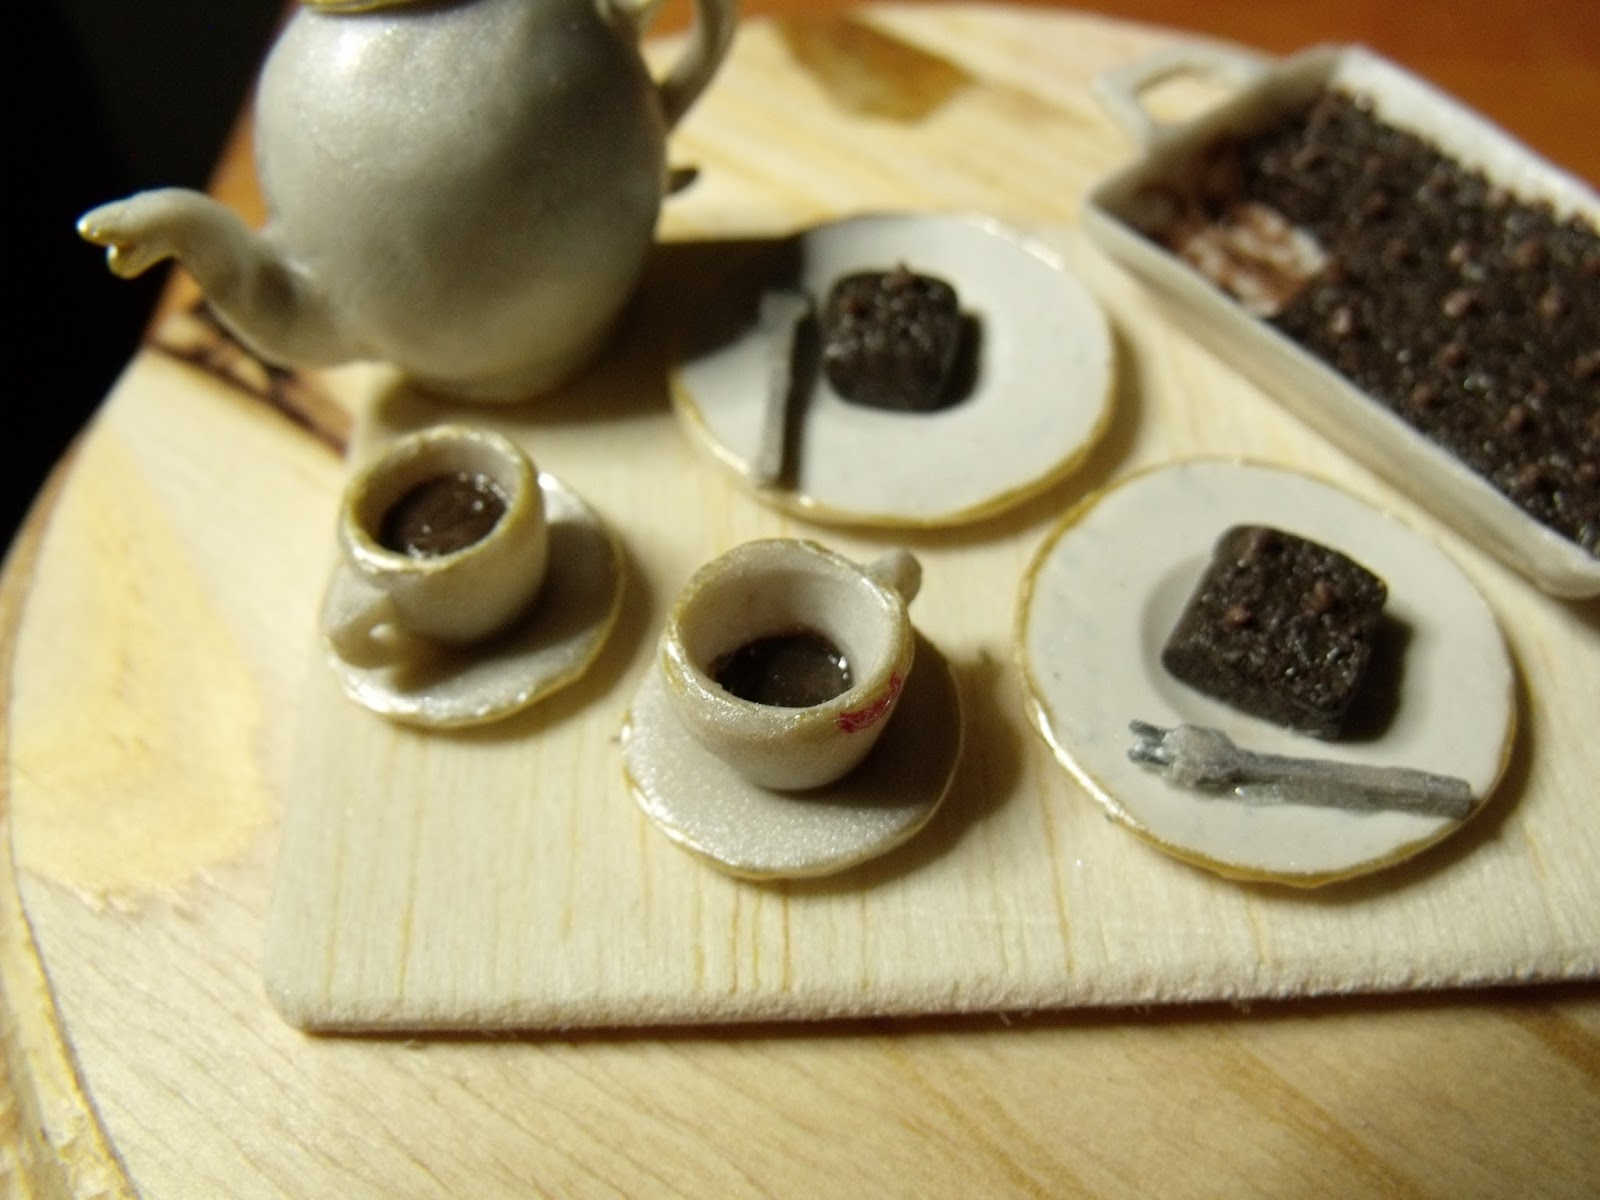
I took a piece of dark brown/chocolate clay and instead of rolling it out, I pressed it to the right height using my fingers. That gives it the uneven surface. I cut it to the right size and put it in the tray.
Keep the cut-offs to be made into the pieces for the plates, just cut into squares and texture in the same way as the brownies left in the tray.

Once it is in the tray, I scraped little bits of the brown clay up the sides of the tray, and textured the body of it with a variety of tools (what ever works). I used my needle, toothbrush, and dotting tools.

I took tiny bits of the cut offs and scraped it along the bottom of the tray.
Again, i forgot to picture it, but I used dome of the scrap clay to add another piece to the one corner, and using a lighter shade of brown, added a few chocolate chips on the top.
The tea set:

For the cups I used the back of my craft knife although I'm sure that a pen would work too.
I pushed it into a ball of the same pearl white as the tray and shaped it a little using my fingers.
I wasn't too worried about the rim of the cup, as I would be sanding it anyway.
For these it is not necessary to leave these on the template because they are small enough not to collapse under their own weight.

Here they ate baked and ready for the handles.

Handles added and baked again. I also sanded the cups and smoothed out any imperfections. I found that the handles were not durable enough to have holes in them, but because of the smallness of them, I don't think that it would be a problem.

I cheated a little here and instead of going through the trouble of using TLS, or coloured resin, I just used a bit of dark brown clay in the bottom of the cups and once it was all baked and ready to go, I glossed the 'tea' really well while using a matte glaze on the rest of the cup.

The teapot started like this. A fat slightly elongated circle. I made this out of the same pearly white clay. I added a flattened piece to the bottom.

For the spout, I started with a snake, and just slightly shaped it using my knife and needle tool...

Another flattened circle went on top for the lid, and although it isn't shown, I employed a similar approach for the handle...

A little fork. This was sort of a last minute addition, but I'll share them either way.
I cut a bit of balsa wood into a strip.

Using tiny cuttings of the thinnest wire I had and, starting in the middle, I poked them into the one end of the balsa wood.

Trim down the excess. I think that I should have painted them, but its a little late now...
All that is left now is a bit of paint and sealing... I used a gold pearlescent paint to add a little detail to the edge of the cups, teapot and plates. I also added a tiny bit of red paint to the lip of the half empty cut: a lipstick mark.


And there you have it.
Well I hope you can have fun with that .
Until next time,
ACL.
No comments:
Post a Comment