Hello dear ones! I hope that you are all loving what ever it is that you're doing...
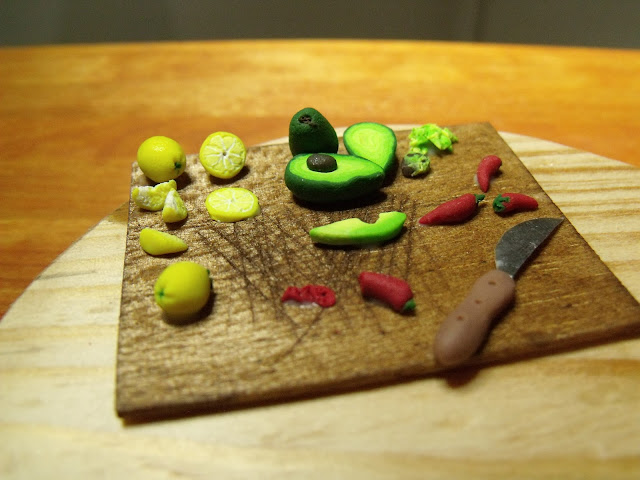
I thought that I could show you my interpretation of a nacho chip plate with a bowl of salsa (and the preparation of the salsa).
Should we start with the chips?
Okay, so I know that they turned out a little too dark, but for the purposes of this post, I'll hope that you forgive me...
So I started by rolling out a thin sheet.
I cut them out into triangles of roughly the same size. I wasn't too concerned that they are all exactly the same, because, well, chips aren't...
Next I used my old toothbrush to texture them and at the same time shape them so that they were no longer flat.
Next I'll show you how I made the avocado.
I started out with a pale yellow and an lime green.
I made a skinner blend with then a little light on the yellow.
If you are not sure how to make the skinner blend, or need a little refresher course, have a look at my strawberry cane in The Pancakes/Crapes post. http://whatsannadoingtoday.blogspot.com.au/2016/07/mini-food-pancakescrapes-with.html
Showing the progress of the skinner blend.
All done.
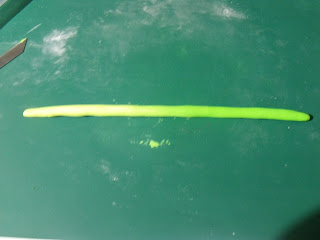
At this point I reduced the sheet to form a roll that starts light and ends dark.
The snake I then flattened and rolled from light to dark.
Here's what that looks like.
For the next part I simply squashed the top half of the cane and made it into a teardrop shape.
I sliced off the ends and cut the cane in half.
Once half I then covered in a thin sheet of a dark green clay. the other I left plain.
The plain one I sliced into thin slices like these. I then sliced these in half .
This is a piece of thin metal (I cut a piece out of a tea light holder and shaped it to the right size).
This is the tea light that I cannibalized throughout this project.
Using my makeshift cutter I cut small little half circles out of the bottom half of the avo slices. This is where the pip would have been.
The cane with the dark green 'skin' I cut into rather thick slices to make a whole split avo. On the back side (not pictured) I pinched the dark sides together and smoothed them over, forming a rounded edge.
Next I used my ball tool to make an indent for the pip.
I used a simple brown clay ball to represent the pip in one of the halves.
(PS. Save all of the cut offs as we will use then to make the mushed avo later...)
I made some lemons too, but at the same time I also made limes and oranges. (I like lemons with everything.)
I used three different shades of each of the desired colours (orange/yellow/green/white). I mixed an equal amount of translucent into each of them.
Starting with the lightest of all the shades I rolled it into a snake and rolled a sheet of the next shade. The darkest shade I kept for the peel. (A skinner blend would work here too.)
Again I reduced the cane and shaped ti to make a teardrop.
I cut the tears haped cane into 5 equal sized pieces.
This part can be a little fiddly, so patience is the key here...
I took a sheet of the white and translucent mix and rolled out a really thin sheet. I used them to cover 2 of the sides of the cane.
(it might be noteworthy to see that for the 'lime' I flattened the rounded side)
Stack them together like this.
This is the flat side. See how there is one still green side left.
Once you reduce this, cut it in half and join together. I took a tiny bit of the white and rolled a little snake and laced it in the middle before joining the two halves.
I did the other fruits a little differently. I added the white over the last of the darkest, but I found that there was too much white when I did things this way.
Once you have the two halves joined. Cover the cane with the last and darkest shade of clay.
This is the completed cane. Reduce to the right size and slice thin slices for, um, slices; and make the cane cuts a little larger for the fruit halves.
Before baking add texture and detail to the inside of the fruit. I used my needle tool for this.
For the peel, I gently rolled the rounded edge of the fruit halves on a bit of sandpaper.
(Almost done...) The knife and the chopping board next.
I cut it to size and left a fair amount on the bottom of the blade which is where I will add some clay to serve as the handle.
(Oh, I forgot about the chilli! They are really simple. A bit of red clay rolled into a thin snake add pinched off at the one end. Add a little curve and some green clay and you are good to go.)
For the chopping board, I took a piece of balsa wood and cut it down to size.
It was really hard to get any photos of this process and none of them really show you what is happening, so you will have to use your imagination for this one.
Once I had the right size I carefully distressed the surface in the middle of the wood with my hobby knife. I made shallow cuts that don't show on the light wood, but be sure not to cut too deep...
Lastly I stained it using black coffee.
The plate and the bowl were pretty simple too.
For the bowl in the center I used the rounded edge of the one handle from my old rolling pin. I shaped the sheet of clay over it and baked it before gluing it into the center of my plate.
And that's that.
Remember the cut offs of the avocado cane? Well I used that and mashed it up (kind of) and filled the bowl with that. The chips were then arranged around on the rest of the plate.
I used a few tiny pieces of the chilli red on the top of the mushed avo...
All done!
I hope you have as much fun with this as I did.
Until next time,
ACL.


No comments:
Post a Comment