Showing posts with label canes. Show all posts

Sunday, 1 October 2017

Tree of Life: A quick and easy cane...

Wow. I only just realized how long it has been since I actually wrote a post. That is my bad, but I'm here now so...

Let's get right to it, shall we? HEre's what I made last night...


And now, here's how I did it...

I stared, as always by mixing my colours and conditioning the clay. In this case I used a pearlescent teal, and translucent as the main colour palette, and added in some bits of dark blue and purple for the rest of the shades.
 This is the teal colour. I ran it through my pasta machine (on the thickest setting) and trimmed the resulting sheet into a uniform shape and rolled it into this fat log.

Now for the fun part. Making the tree and it's branches...
I cut out that tiny wedge in the middle.
 Here's what is left when the wedge is removed.

If you are wondering what that white stuff is, it is corn starch. My blade is a little blunt, and the new ones have not yet arrived in the mail. Here's my work around:
The problem with a blade that isn't razor sharp in caning is that it can often have quite a bit of drag, which is definitely NOT what you want. 
Provided that the blade isn't too blunt, if you cover it with a tiny dusting of cornstarch (or talc/ baby powder), the drag is reduced considerably. In fact, in this instance, I would go as far as to say that it has been eliminated entirely.
 The tree and its branches is made from this mix here. As you might be able to tell from the photo, the colours aren't, and don't have to be, fully blended. In fact, I really like the marbled effect that is created while mixing the colours. 
Right, so, again, I rolled the clay through my pasta machine on the thickest setting and lay the sheet out. 
With a little guess work, I estimated how much of the clay I would need for my tree, and put the rest aside.
Now this part was really fun to do. I grabbed my silver leaf, in this case I was using the one from Mont Marte (I don't think that the brand matters all that much, but my experience with silver/ gold leaf is rather limited...).

 I covered the clay with the silver leaf, and again ran it through the pasta machine (on the same setting) just to help the clay and the silver leaf to form a good bond.
 Then I simply filled that wedged gap from before with the now silver covered sheet. 

I continued making cuts in the teal cane (this time without cutting any of the teal away) and inserting sheets of the darker colour. I tried to make sure that the silver side was always facing the top of the tree (although,again, I don't think that it matters all that much).
 This is what I ended up with once I had all my branches in place. I also widened the base of the tree's trunk by cutting away small sections and replacing the teal with the darker mix.

The last thing to do is wrap the entire cane with a final sheet of clay. 
What I did was use what was left of the branches' clay and mixed in the silver leaf so that it looked like glitter in the clay (without having any of the issues that glitter has where caning is concerned) and added a tough of royal purple to make it darker still.
Back to the pasta machine and then just roll the cane up. Easy-peasy!
When that is all said and done (an the ends have been trimmed), this is what I got.

I don't know about you, but I quite like it!
 Here I was playing around with my first slice, adding tome textures to the back ground etc., just to see what I like. 


(The coin is an Australian 50c, and yes, it is the biggest coin ever made that is still in use, in my opinion anyway. A few of those puppies in your purse and not only does it weight a tonne, but that puppy might not even close!)


After playing around with it for a while, I came to realize that I really just don't like that low branch on the right. It was just weird. 
No need to panic, or even re-do the entire cane.Here's how I fixed it:
I simply cut out the offending bits of clay.

 Took one of the end buts that I cut off earlier.
 Cut off a small slice and 'harvested' some of the teal. This is a good idea if you no longer have any of the original colour left, or if you just wan to make entirely sure that the colours will match exactly, and that the fix will not be visible after the fact, especially after baking.
 
Pop that  bit in the hole and do a but of smoothing and blending to hide the fact that it was once a hole...
 Voila! No more branch, and Anna is once again happy!
Its all good and well to have these awesome cane slices, but before baking, I needed to decide what they will become. In this case I opted for either a pendant or a key-charm. Either way, we will need some way of attaching it to wither a key-ring, or a chain, so time to dig into my beading supplies and find some of these loopy things (eye-hooks they're called, if I am not mistaken).
 (This step isn't essential, but I like to do it, just to be safe.)
I add a little kink in the straight part of the wire, the part that will be embedded in the clay. In my experience, a straight wire/ pin is likely to pull out at some point, but a curved or bent wire is a lot more likely to stay put.
 So I don't like to have the design on both sides of these things, for no particular reason other than I don't like it...
What I do instead is take some of the scrap bits from the caning process (there is always a whole lot more than I care to have anyway) and mix these together, but only barely; so that I get that same lovely marbled effect as on the tree branches. then I simply make a disc the same size as my cane slice and butt them together. before doing that, I add the loopy thing (making sure that it is positioned correctly).
 Finally I make my mark on the back, along with the date, because, in my opinion, if you are proud of something, you should put your name on it.
 The last thing I did was add some different coloured pearl ex powers, and then I baked the whole lot at 115°C for about 45 minutes.

And there you have it! Quick and easy!!!

Well, that is all I have for you for tonight, but be sure to check back in a few days, as I have been rather busy, and I have two other projects to share. 

Until next time,
ACL

PS. For those of you who would like to support me and my at, please think about heading over to my Patreon page and becoming a patron: https://www.patreon.com/annacl . I would be eternally grateful.

PSS I have been using a different, instant, communications platform, and if you are interested in contacting me with questions and/ or comments, find me instantly (messages are sent directly to my phone) here:
https://reaches.me:8443/urlchat.html?guestid=6aa28459a91aad02692a9334f633919a
 
Its a fairly unique platform with a huge range of uses and features, but I like the chat. Alternatively, download it form the PlayStore. Search for chatWORLD or follow this link: https://play.google.com/store/apps/details?id=com.world.chatworld&hl=en




Tuesday, 16 May 2017

Kaleidoscope fun...

Hello lovelies. 
Again I want to apologize for taking so long between posts, but, like I said before, I have suddenly become a lot busier (and not in a artistic/ crafting way, unfortunately), but never mind that. 

Let's get right into the little bit (actually its more like a lot bit...) of fun that I have managed to squeeze in in my last few clay-play sessions.

So, as those of you who keep track know, I had put the clay away for a minute and worked on a new cross stitch. That has now, in turn, also been put away, and I am back to my clay. 
Now, as per usual, I have about a million different ideas in my head of what I want to do and what I should do etc, but the one idea that I ended up working on was something that I had not done before, and the results where AWESOME, if I do say so myself.

Here's what I made:


Cool right. Thankfully I have also encountered some new victims, I mean: made some new friends, so not all of these creations will go to the museum of Mom (like just about every other project does)...

Here's what I did:

 I started by making 6 different Skinner blends. Now if you aren't sure what that is, it refers to a technique of blending the clay so that the colours fade into one another, and it can be used with any colours, but works best when you have a light and a dark colour so that the contrast can be more easily seen. (It was devised by a lovely and super talented lady J. Skinner, hence the name.)
So starting off with two colours, in this case pink and white. First and most importantly, the clay needs to be really REALLY well conditioned. 
I usually do this by running it through my pasta machine/maker a whole bunch of times... When you feel you are done with the conditioning (basically warming the clay up and making pliable as well as making sure that the plasticizes (the polymers) are evenly distributed reducing the likelihood of cracks etc. when baking), make two squares, one out of each colour. 

(They don't have to be exact, but as close to the same size as you can get). Cut through both squares diagonally, it doesn't really matter if you go from top left to bottom right or vice versa.
 Stack the like colours together, and combine with the opposite colour to reform the square sheets.
Like this...
(sorry; no photo for this part, but:)
Place the squares on top of each other, like colours on top of one another, and run that through the pasta machine.
If you don't have a pasta machine, don't worry, it is possible to do this without one, it is just a whole lot harder! Use a rolling pin instead, but make sure that you always roll it out to the same thickness every time.
After running it through the pasta maker, fold the bottom edge to the top and run through the pasta machine again, in the same direction as before.
And again, always inserting the clay into the pasta machine in the same direction.
A good rule of thumb here is to feed the folded part into the rollers first.
After about 20-25 passes through the pasta machine, you will have something that looks like this. 
Just so you know, the more times you fold and run the clay through, the better the 'fading' effect will be and so long as you keep doing it in the same direction (folding and feeding/rolling out), it will only get better, and in my experience you cannot over do it, well not the SB (skinner blend) anyway...
 Here was one of the others...
 ... and its result.
The next thing that I did was to cut and stack them. Other artists simply fold into what is called an accordion fold, but I find that this ways is less prone to errors (for me).
This is what I mean with "stack". I keep the sequence of the segments, and in this way I now have a block instead of a sheet of clay.
I keep the two halves separate (for now) for a reason, but I'll get into that later!
This is a different colour scheme.

Here's where the fun starts...

I'll use this colour as the example. 
 First I took this stack and manipulated it into a roll...

 Like this.
Then I took the pink and white one... This one I left in a sheet as it was when I finished the SB, and rolled out my log a little thinner and wrapped the log in the pink/white sheet.

I did the same thing with the rest of them, but there s where keeping those two stacks separate comes in handy:
 If you put them together like this and slowly and gently roll them out together you get a lovely wrapping sheet that starts and ends with the same colour rather than the contrasting colours suddenly meeting in the wrap.
 Like this...

 See?...

Here is where we enter the point of no return. Yes, it is scary, but it is also amazingly, awesomely fun...
 Take these three rolls and stack them ontop of each other. the order doesn't really matter, which ever way you want.
Now flatten them a bit. 
Like in the photo...
 Here is where those lovely lines come from!
Use a tool like a paint brush end (so o long as it is the same thickness throughout) or a needle tool (I found mine was a little short and difficult to handle easily) or you can use, as I did, a knitting needle. Whatever it is or however thick it is, is up to you, but this will determine the waves/spikes in the end product, so the thinner you go, the harsher the lines at the end will be.
 Pick it up, carefully, and reshape t back into a rectangular shape (like it was when you started), flip it over and do it again. This time however, avoid making an indent right onto/into one of the first ones. Trust me, it is not a good look...
 Just a little side note here, I like symmetry and try and avoid chaos; generally (no laughing please), and that is the only reason that my indents are spaced more or less evenly apart.
 Here is a side view of what I ended up with...

(Again, not pic, sorry, but...)
What I did next was to reform the rectangle again, and then I actually cut the whole thing in half. The reason I did that is because depending on which side you pinch up to form the triangle when turning this into your cane, will determine the center of your cane.
 Here's what I mean. So the one on the left had the lighter (or the top of the above pic) pinched in from the square shape to form the top of my triangle, the right one was done in the exact opposite. 
This is what I mean by fun. I literally used the exact same process and indeed the SAME clay, but the results where really awesome and vastly different.
 So if we call the left one cane number 1 and the right one cane number 2, this is what I mean with awesome and different:
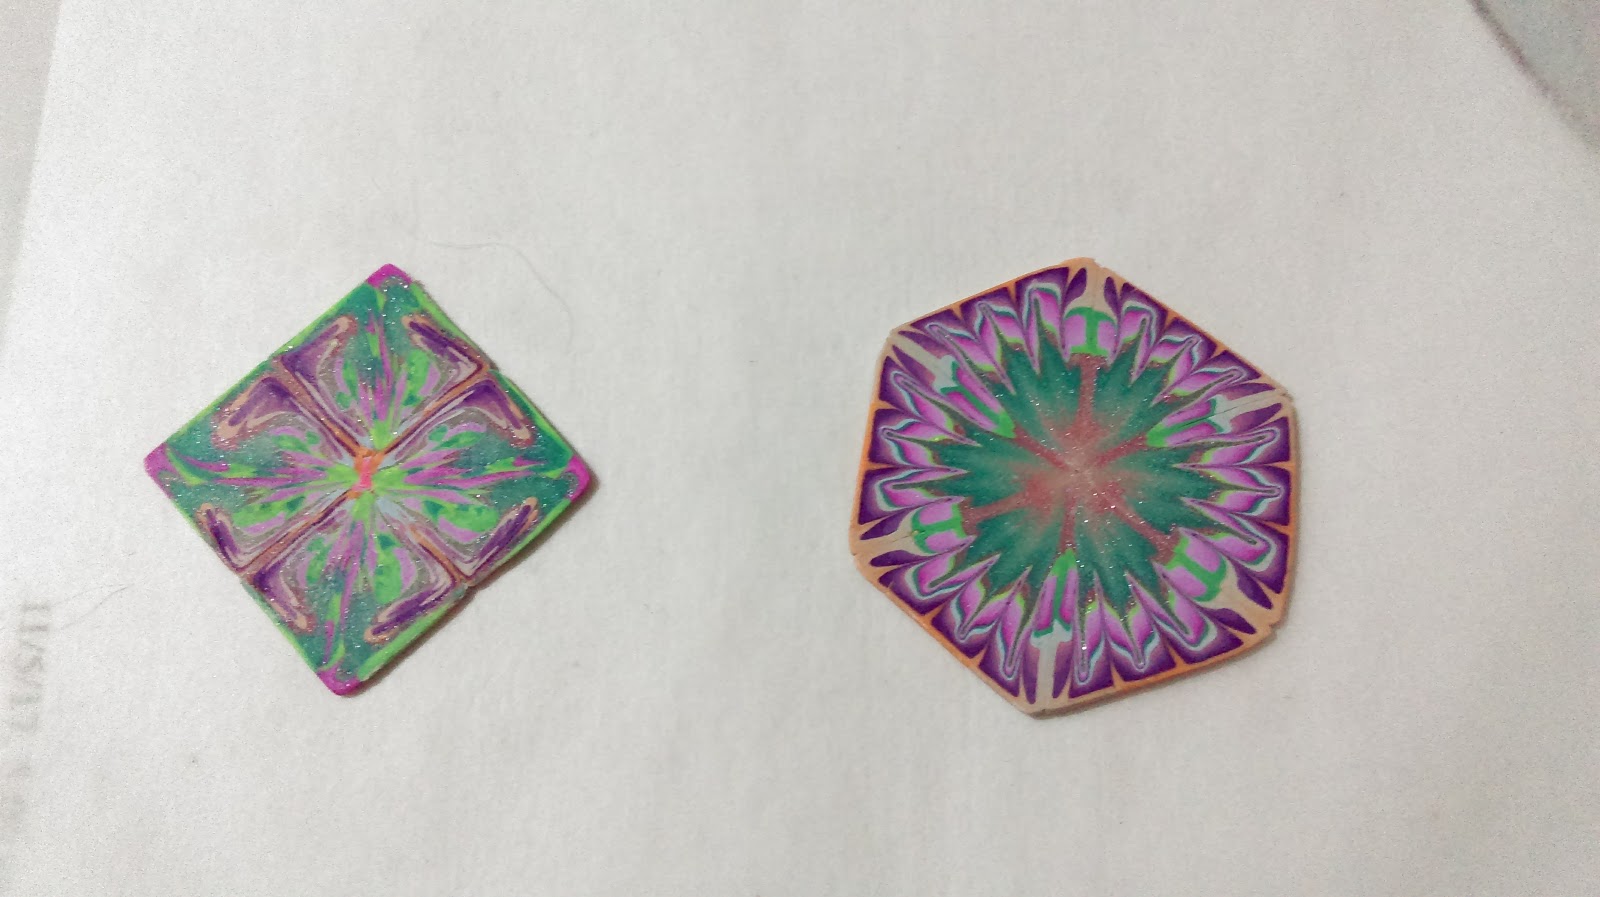
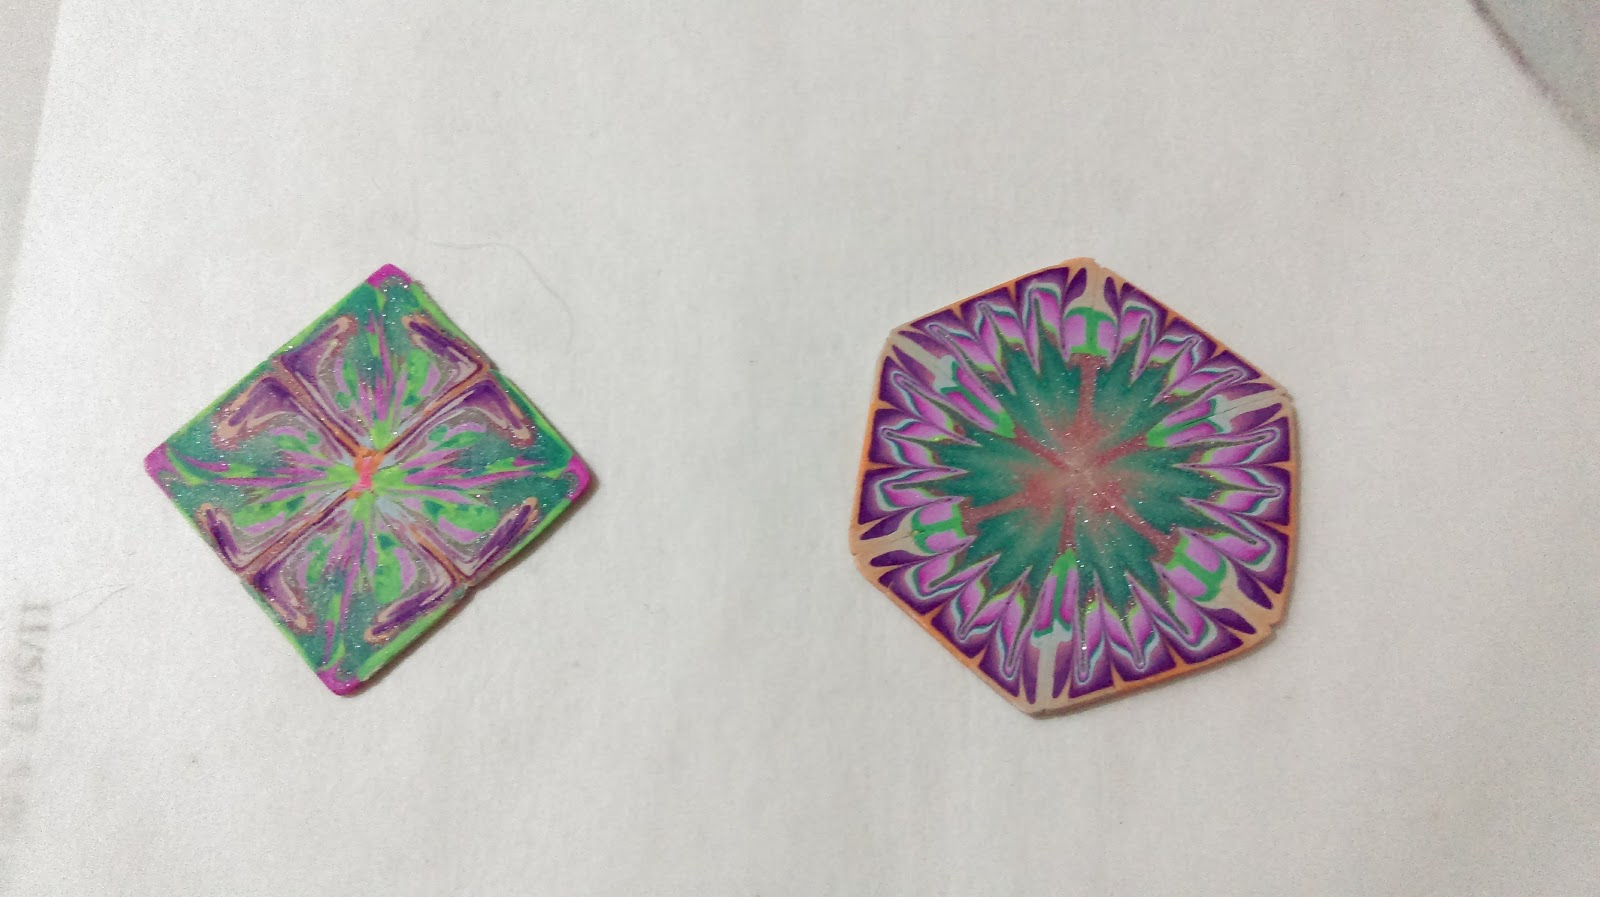
 Cutting 6 slices off of cane number 1 and making a hexagon produces this pattern...
 ... and cutting 6 slices off of cane number 2 and arranging them in the same manner, I got this pattern instead...
 I made pendants (one of which has found a new home...)
 And a candle holder (for Mom, I have the excuse of mother's day presents, so she can't say "Please, no more!")
 This is the other side of the same holder, with the 2nd design...
 Here are some different colour combinations that yielded different results...


 This one has tiny garnets embedded in it and is most likely my favorite one of all...

Now you may have noticed that these ones have the same colour scheme and you are correct. 

The one thing I hate about canning is that there is so much "waste". All of those bulge-y bits that you constantly have to cut off etc, or even slices that are just not right.
Of course you can turn this into 'scrap clay' which also has its uses, but in this case I just couldn't bare to waste all of those lovely colour blends and combinations! So I made these lovely swirls...


Some of them I'll turn into pendants, some into broaches or pins, and some will just be worry stones, you know, something pretty to play with... Most will be gifts...
Here are some close ups:


Honestly, I cannot pick a favorite either. I love all of them and love different things about just about every one of them...

If you are interested in knowing how I did them, let me know and I'll do a post about that some other time...

That's all I have for you tonight, so...

Until next time...
ACL

PS!! Please don't try and recreate exactly what I have done, because it might be close to impossible. I doubt even I could do it and I know exactly what I did...

PPS I have been using a new communications platform, and if you are interested in contacting me with questions and/ or comments, find me instantly (messages are sent to my phone) here:
https://reaches.me:8443/urlchat.html?guestid=6aa28459a91aad02692a9334f633919a
 
Its a fairly unique platform with a huge range of uses, but I like the chat. Alternatively, download it form the PlayStore. Search for chatWORLD or follow this link: https://play.google.com/store/apps/details?id=com.world.chatworld&hl=en