Hi all.
I am sorry that I have been MIA for a while, but as you all know, life sometimes takes precedence over art, and that is exactly what has happened here. However, I am back now and ready to get back into it.
I worked on this next sculpt for a lot longer than usual, and only just recently finished it finally. That is to say that I have had the main body (literally and figuratively) finished for quite some time, but I only last night put the finishing touches on the scene.
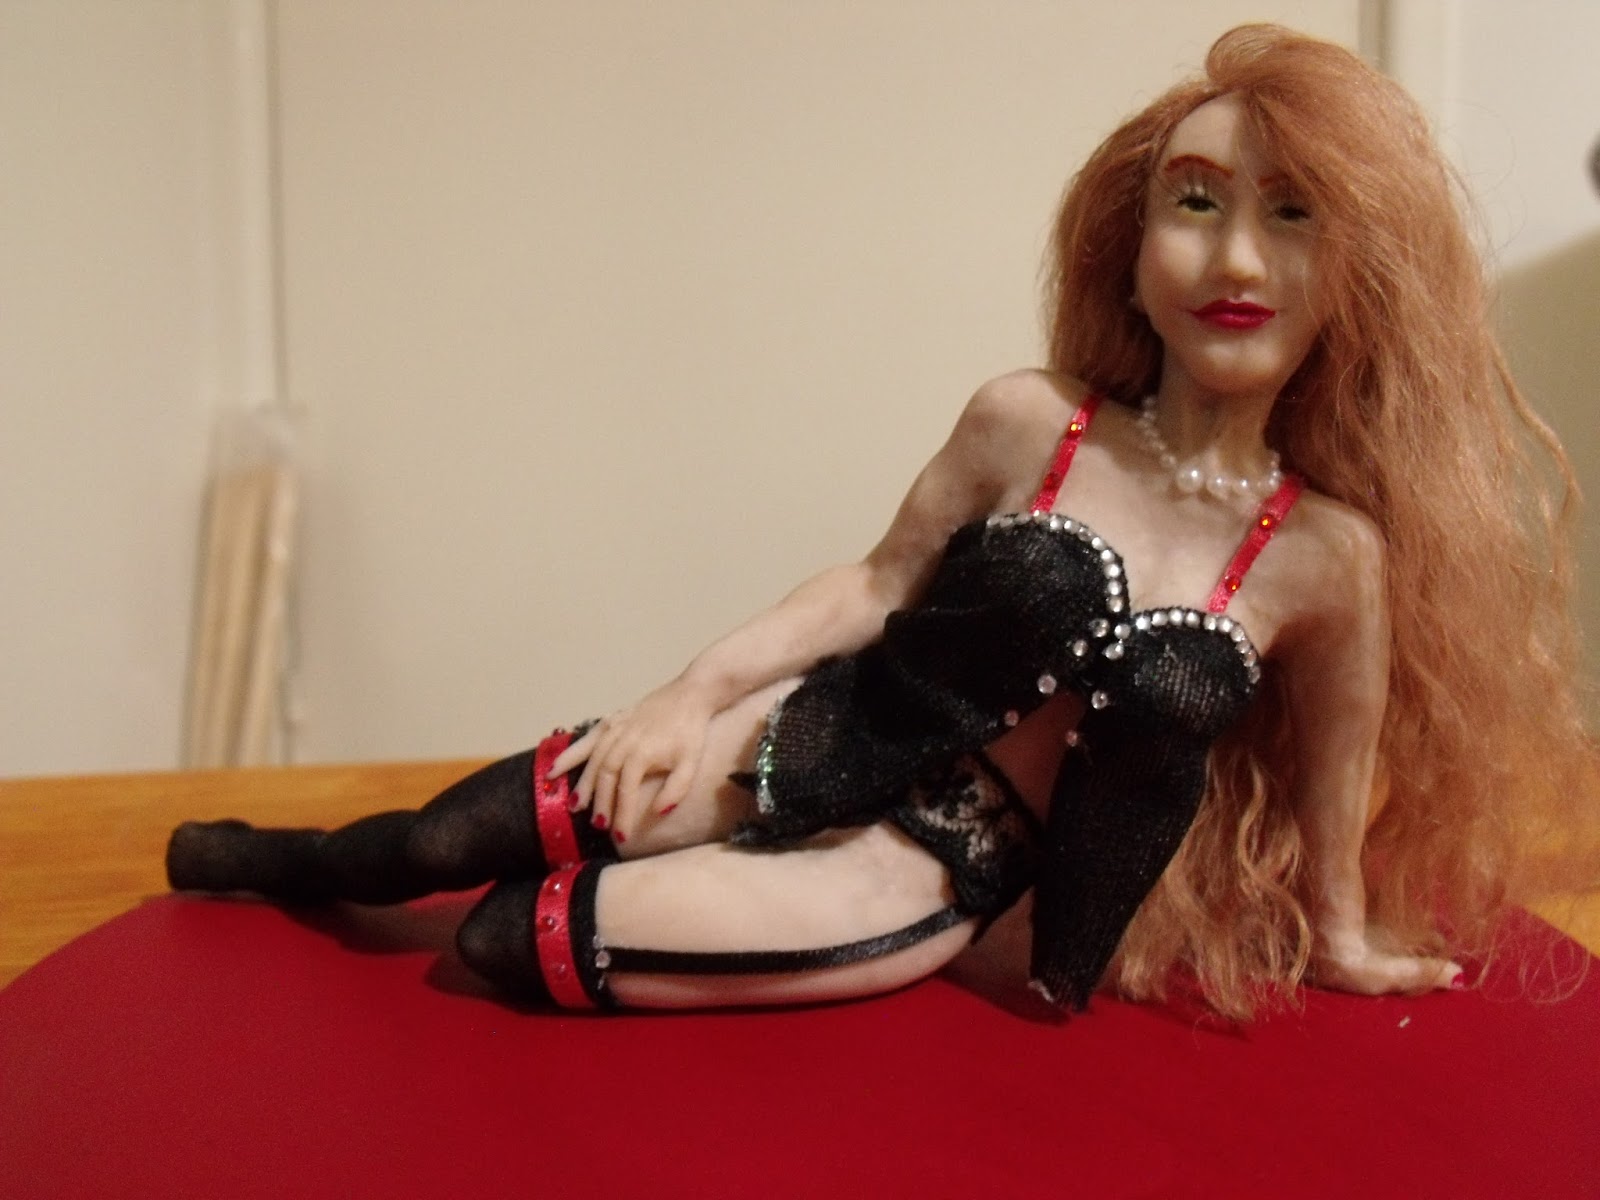
Here she is:

In this piece the only thing that I didn't make myself, was the wooden base that she is lounging on. Here's how it all came together.

I started, as usual with a basic idea and made an armature the right size for the sculpture I wanted to create.
Once I had the proportions correct I added clay, a little at a time to reach the correct body mass.
 Here is what it looked like before I started adding details.
 This is the original face that I made and used. (I generally make a few faces and do so separately form the body and later on use the face I feel works best with the body that I created. In this case however I was quite far into the process of the sculpt before I changed the face. In all honestly I just didn't feel that the face and facial expression matched what I was going for.)
 I found this really cool, um... thing one of my favorite secondhand charity shops. I really don't know what its original purpose is/was, but I find that it has come in really handy in hanging the sculpt. By hanging it, I find that I have better control. (Please excuse the mess that is my work space.)
 A view from the back. Before I had the thing I used to have quite a bit of trouble with one side or the other either getting flat spots, or worse still, being squished while I was working on the opposite side. Not anymore though.
 Shaping the legs and feet.
 Posing the body. (Here she still has the original face.)
 After baking the main body I start adding the hands and feet. By baking her first I lessen the risk of destroying some of the work.
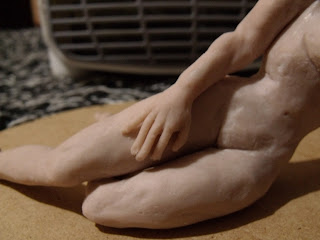
 Here I have done some work on the hands. Sorry about the poor light quality. These photos were taken just before dusk, and that is really not a good time to take WIP (Work In Progress) pic.
 A view of the other hand.
 And the back.
 (Back to good lighting.) She now has feet as well.
 The reason that you can see a heater in the back ground is not because it was cold, but becuase i find that for curing tiny bits like her hands and feet (just partially) a heater works really well. Naturally a heat gun would be preferable, but I don't have one and really cant afford one at the moment.
 Another reason for using a tool (heat gun/ heater) over the oven at this point is that the clay will darken slightly every time that you bake it. So if, like me you bake the sculpt numerous time during the process, the hands and feet can end up being slightly paler than the rest of the body. The difference might be subtle, but it really bothers me.
 Once I am sure that the entire process of adding clay is complete, that
is when I will put her back in the oven for a final time.
Once I am sure that the entire process of adding clay is complete, that
is when I will put her back in the oven for a final time.
 It was around this time that I also gacve her a new head/face.
 (Again, excuse the mess) Here she is from a different angle.
 A close up of her lovely new face.
 After the final bake I generously covered her in baby oil and left it to soak in over night. (she may or may not have lost some fingers in the process, which was devastating!)

 A shot from the back.
 Now for the fun part:
 I used lamb hair for the first time and I must say that, of all the fibers that I have used, I love this one the most. The natural waviness of the hair is beautiful and it looks great.


 I glued the hair on in stages, but because I was excited to be doing something new and also because I am a little absent minded at times, I completely forgot about the WIP photos. Sorry.
I will do another sculpt soon and I will do my best to show you the process I use to put hair on them.
 The same thing happened with the costuming, but mainly because that is just cutting and pasting fabric, and not because I was distracted by the new.
 I later trimmed her lashes, but at this stage the glue was still drying, and I know from experience that until it does, it is best not to touch them.
 The accents on her top are tiny rhinestones that I got off of eBay and they were sold as nail art accessories.
The same can be said for her necklace. It consists of flat backed peal-like nail art.


 The trim on the back of her stockings ans well as around the hem of her top is simple glitter glue.
 The base is something that I purchased from my local markets. It is press-board (wood), that has been cut into a circle with the diameter of approximately 20cm. All i did was paint it red.
 Here you will notice that her lashes are a lot less camel like (seriously, Google how long their lashes are, its insane!).
 This is where things got really tricky and also why it too so long to finish this project.
Someone suggested that I add a cocktail glass to the scene and I loved the idea. The problem was I would need to make one.
I started by making a mold of this.
 This isn't quite the mold that I used, but the one I used is in a thousand pieces at the bottom of my bin (don't ask), so this one will have to do.
The second (flat) piece is the base of the glass.
I filled my mold with clear epoxy resin in the hopes of making the glass that I envisioned.
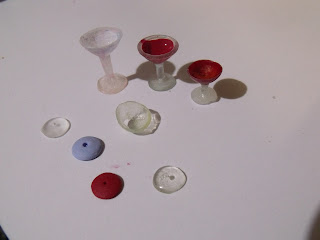 Needless to say this proved to be rather more tricky to do than I
thought it would be. Here you can see some of the failed ones that I made.
Needless to say this proved to be rather more tricky to do than I
thought it would be. Here you can see some of the failed ones that I made.
Keep in mind that I made these one at a time and they each took about a day to mold and cast in resin.
Some were too shorty, others skew, and others still were just a complete disaster.
I ran into a myriad of problems, including how to fix the base to the stem and getting the resin to look glass-like.
In the end however, I think I did a fair job.
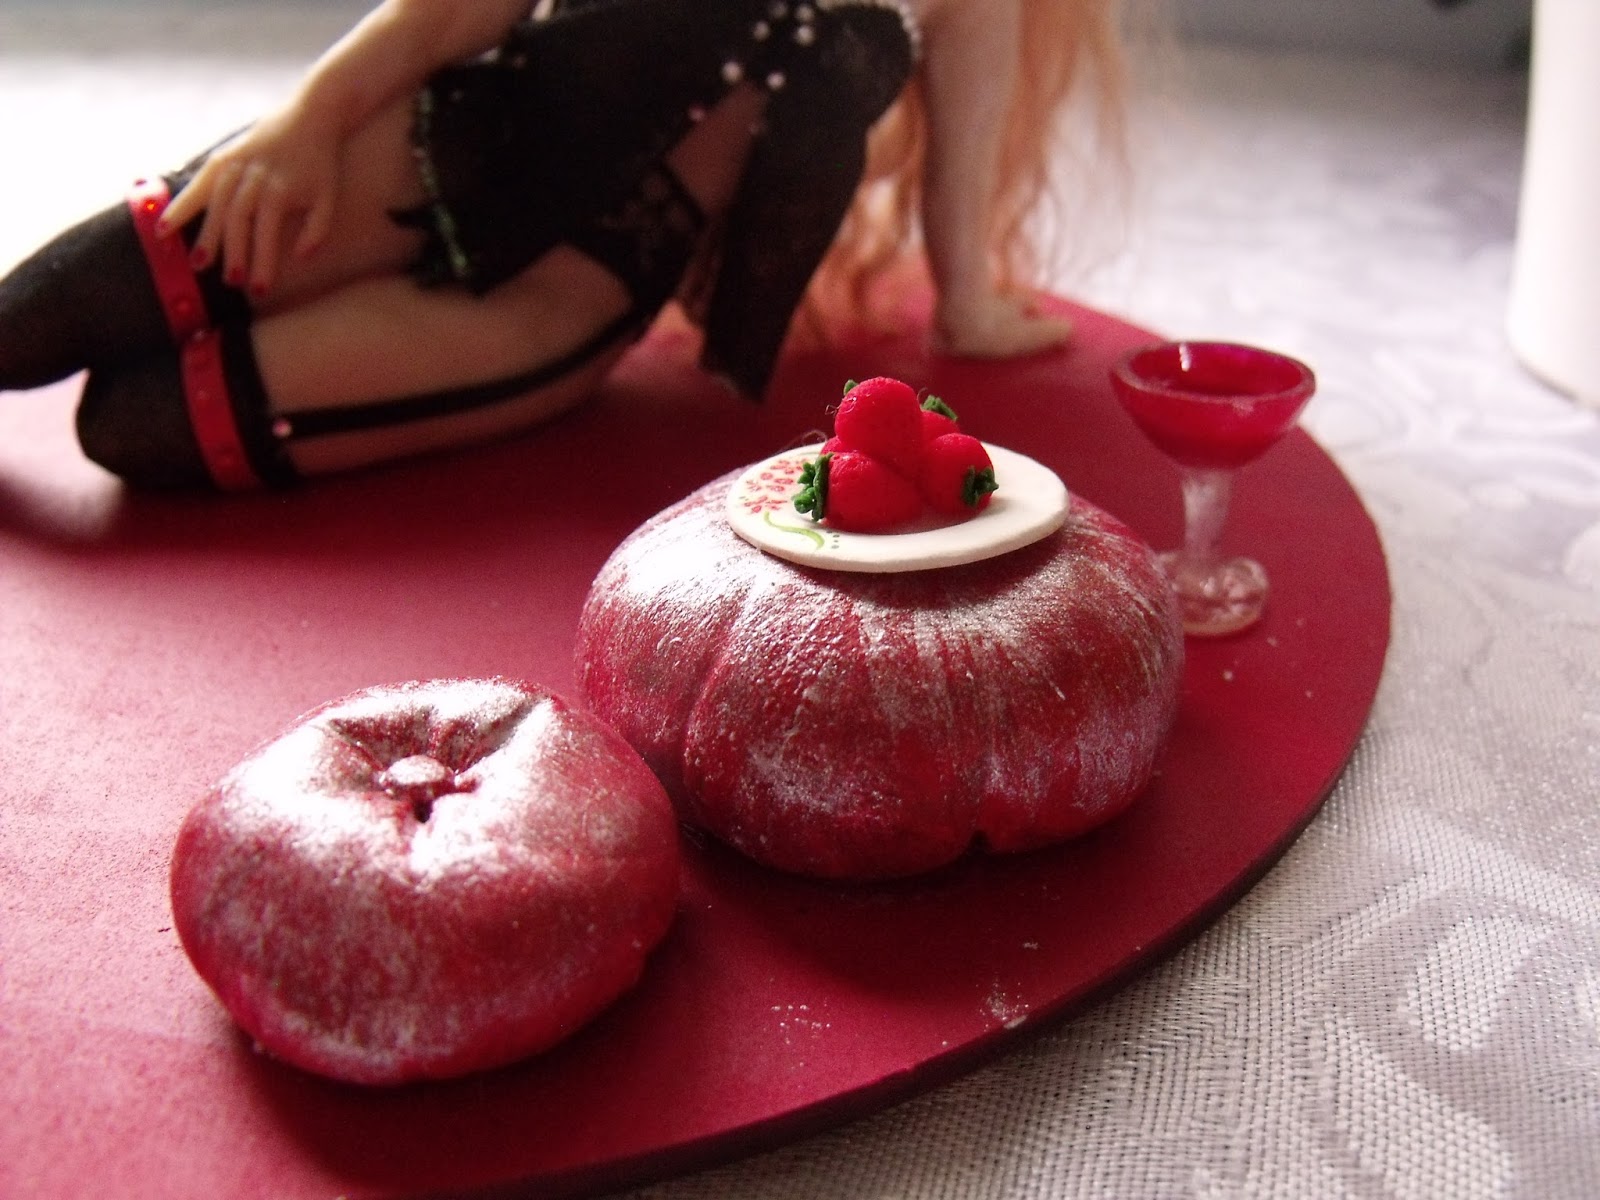
 I filled the glasses with the same red nail polish that I used to paint her nails to fill the glasses once they were ready for it.
 The other thing that I added was this little plate of strawberries. I painted some little decorative flowers and leaves on the plate, just to add a touch of whimsy.
 The cushions that are around her I made from some scrap clay (at this stage I was unsure about what shape etc. I wanted them to be. I stumbled on this design and I think it worked out rather well.
 I finished them off by adding a 'button' to the middle and baked them.
Once they were cooled I painted them over the course of a few days, waiting for each coat of paint to dry fully before applying the next one. I started by painting them white, and later red. I finished the painting by giving it a single coat of iridescent pain for a subtle glittery sheen.
A bit of glue to secure it all, and there you have it.


I couldn't resist putting my lovely orchid in the photos too. I find it to be utterly gorgeous and really inspirational.
Well that is me done for another day. I hope that you liked it and that you can perhaps use some of it in your won creations.
I'd love to hear what you think.
Until next time,
ACL.


I will do another sculpt soon and I will do my best to show you the process I use to put hair on them.


The same can be said for her necklace. It consists of flat backed peal-like nail art.


Someone suggested that I add a cocktail glass to the scene and I loved the idea. The problem was I would need to make one.
I started by making a mold of this.

The second (flat) piece is the base of the glass.
I filled my mold with clear epoxy resin in the hopes of making the glass that I envisioned.

Keep in mind that I made these one at a time and they each took about a day to mold and cast in resin.
Some were too shorty, others skew, and others still were just a complete disaster.
I ran into a myriad of problems, including how to fix the base to the stem and getting the resin to look glass-like.
In the end however, I think I did a fair job.


Once they were cooled I painted them over the course of a few days, waiting for each coat of paint to dry fully before applying the next one. I started by painting them white, and later red. I finished the painting by giving it a single coat of iridescent pain for a subtle glittery sheen.
A bit of glue to secure it all, and there you have it.


I couldn't resist putting my lovely orchid in the photos too. I find it to be utterly gorgeous and really inspirational.
Well that is me done for another day. I hope that you liked it and that you can perhaps use some of it in your won creations.
I'd love to hear what you think.
Until next time,
ACL.