WOW. Turns out I have completely forgotten to hit the "Publish" button on this here blog post, which kind of explains why I got some really impatient ladies questioning me about when I'm going to finish this. Sorry everyone!


And so, here it is: The third and final part on how to sculpt a female BJD. (Oh, and also, no, I have not yet felt the urge to continue working on it ie making the clothes and wig, but when I do, I'll let you know!)
Let's get back to sculpting:
We left off at the baking of the head, so let's finish that before moving on the the hands and feet.
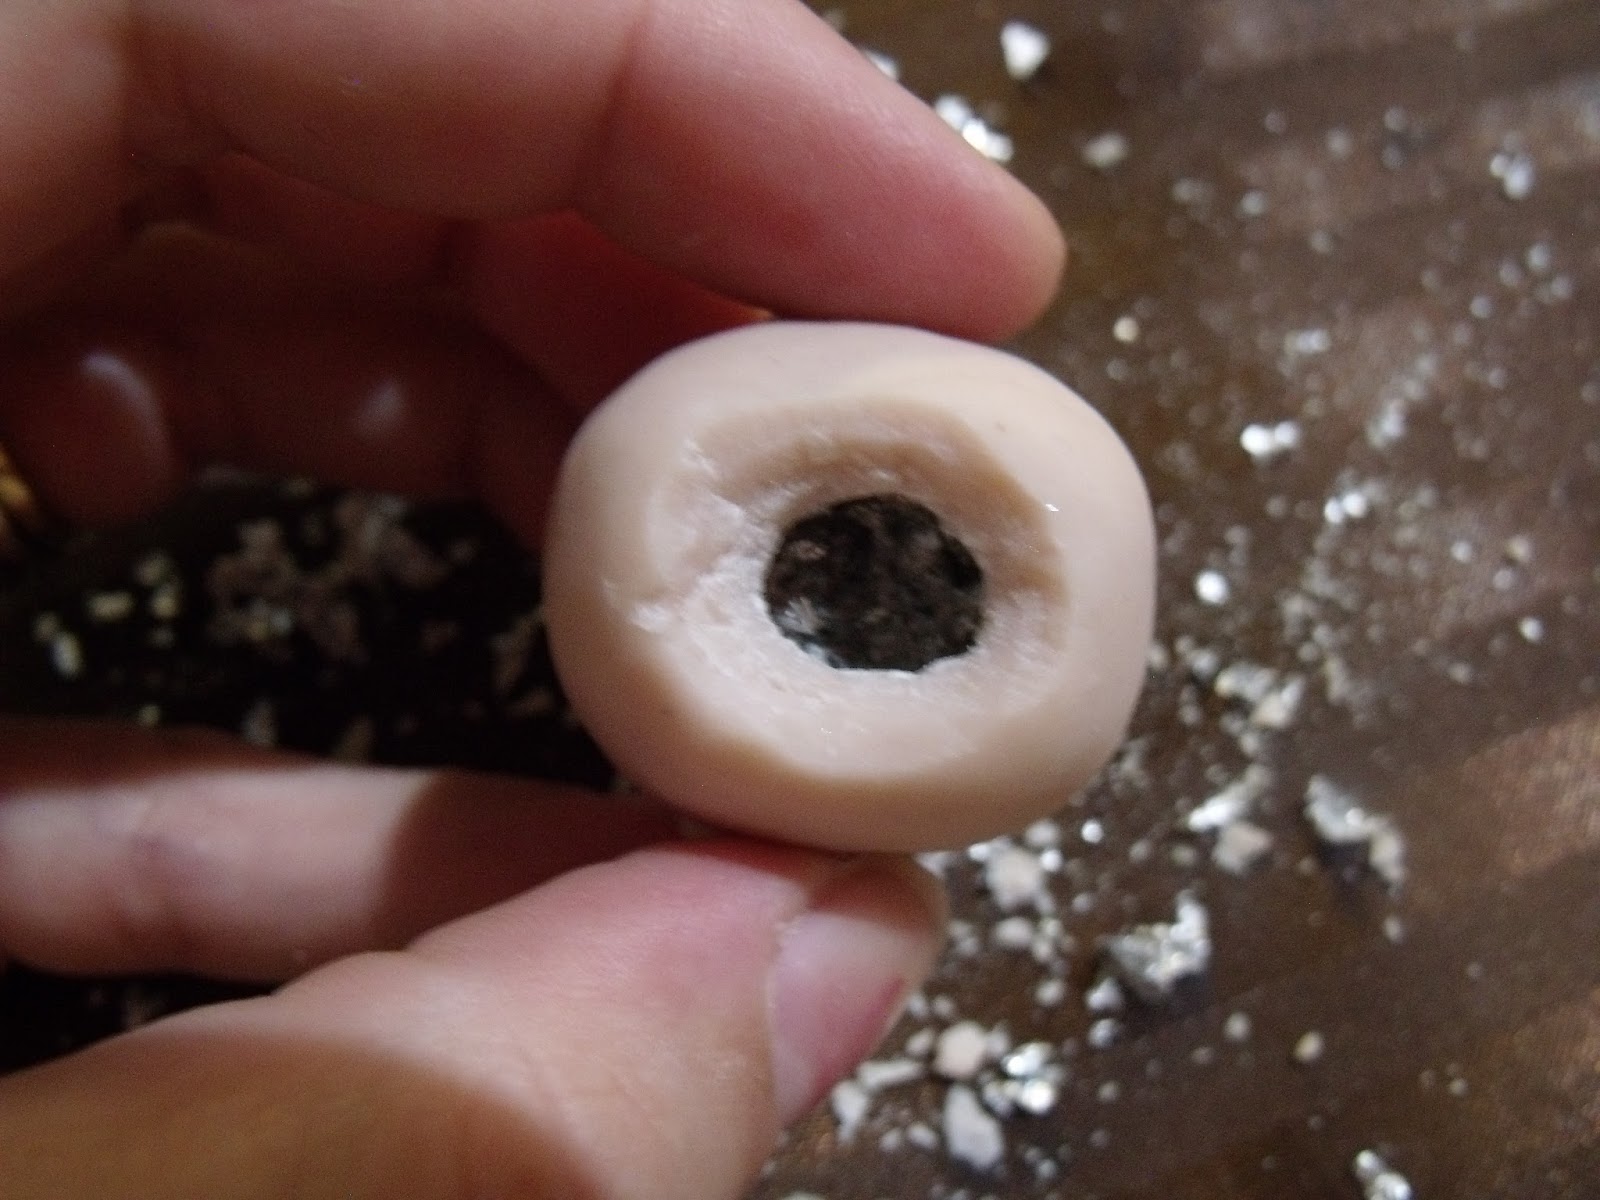
 First, after the head has cooled, I slowly and carefully cut out a rather large section from the top of the head.
It's importasnt that the top of this hole is wider that the bottom of it.
 Now that the hole is in place, I can start to remove the foil. This is a tedious and rather boring (and at times difficult) job, but the end result was worth it.
 Can you see the bottom hole?
Now I didn't get all of the tinfoil out, but it was enough so that there was a cavity, so that was good enough.
 A quick look form the side...
 Now to make the skull cap. The point of this is to have somewhere where all of the elastic that I use later to string the doll together has somewhere to be anchored to.
Okay, so I would really rather not have the cap stick back onto the the head so I gave the head hole a light dusting of baby powder (cornstarch works too)
 Next, I got a little ball of clay, about the right size, and presses it onto the top of the head, over the hole, and pulled it back out again.
 The hook that I used looks like this. It is basically one of the pins that I used for the wrist and ankle joints with a few added twists.
 It kind of looks like a primitive cork-screw shape, the idea being that it will be less likely to simply pull out of the clay once it is all baked.
 Here is the skull cap. I took the ball and trimmed it to the shape of the skull after inserting the hook.
 I found that because the hole looks, at frist sight, to be uniform, there are slight and subtle differences in the clay surface and, because this cap is molded specifically to this head and I want it to fit perfectly, I made this little "X" so that I know which side is which. I also baked this head as a whole as the clay tends to expand a little when baking and this will ensure that it all stays the way I want it. (Remember to re apply the powder before baking!)
And that's that.
We left off at the baking of the head, so let's finish that before moving on the the hands and feet.

It's importasnt that the top of this hole is wider that the bottom of it.

Now I didn't get all of the tinfoil out, but it was enough so that there was a cavity, so that was good enough.


Okay, so I would really rather not have the cap stick back onto the the head so I gave the head hole a light dusting of baby powder (cornstarch works too)


And that's that.

The hands: Now I have tried so many different techniques
and looked at hundreds of online tutorials etc. for hands and feet, and I
have come across this way to do it, which is a combination of a few
different ones. But find what works for you!
I start with a snake and flatten the top into a rough hand shape (less the thumb).
When
I am happy with the rough shape and the wrist placement etc, I draw in
the top of the palm and split the rest of the clay in half, and then in
half again for the fingers.

Something like this.

When the fingers are all in place, I add on the thumb. The piece that I add extends to the bottom of the palm, this helps to flesh out the entire hand and helps make it look a little more realistic.

Now to add some definition and shape to the fingers.
This part can get really difficult and frustrating, but persistence and perseverance really does pay off in the end, I promise.

Remember
to make sure that the hand fits on the doll, and that the proportions
are correct. The hand extends from the chin to just above the eyebrows.
So if the palm is resting on the chin, the top of the middle finger is just a
little above the eyebrows.

Now for another tricky part... Before I add the final details like the finger nails and the bone lines, I attached it to the wrist joint that I have already made.
To do so, I cut a slit into the hand and insert said joint into the cut.
Then it just becomes a matter of sealing up the cut and ensuring a smooth and seamless join between the two.

And there it is.
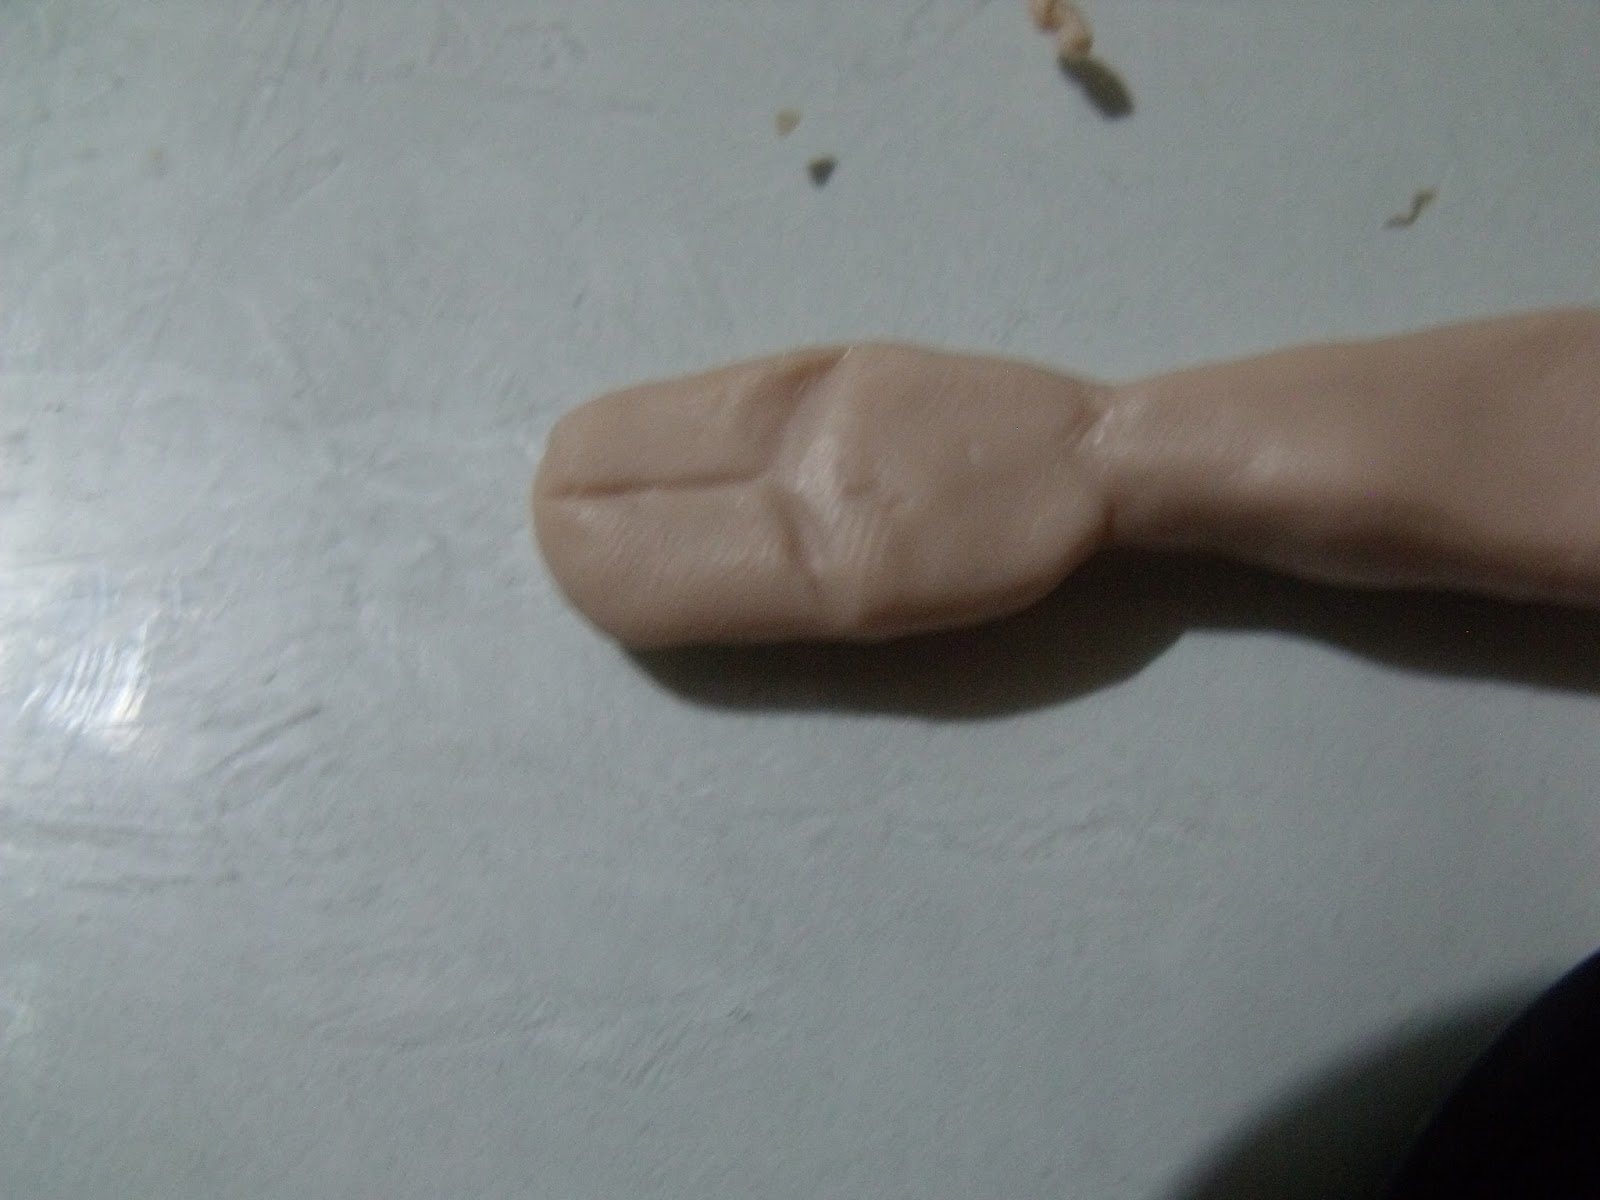
On these hands, I tried to get them to look un-posed. In other words, I wanted them to appear relaxed and not for example, pointing or balled into a fist or something. Naturally, the hand isn't flat with the fingers extended. Rather the fingers tend to curl in slightly.

Here is a photo with the palm facing up.

I couldn't get my silly camera to focus much closer, but if you look close, you can see some finger nails and some knuckle lines.
I have also extended the separation between the fingers by dragging a ball stylus from the bottom of the finger towards the wrist.
I have found that by doing this it makes the hands more petite, a little thinner, as it gives the illusion of some of the metacarpal bones being visible.

Now this next part is not recommended, but I thought I would show you what happens when you are in too much of a rush and forget to check that everything is as it should be BEFORE baking the hand.
What has happened here is that the wrist joint had gotten twisted whilst I was adding the final touches to the fingers and that, so now the wrist will only be able to flex from left to right but not up and down...
What a smuck move.

To fix this I could of one of two things: (I'll admit I cried a little in frustration here) either re-sculpt the entire thing, or try and fix it. I went for the latter...
Forst thing I did was remove the joint form the rest of the hand.
I CAREFULLY replaces the joint and, with the use of some TLS/Bake 'n Bond (I can't remember which I used here) and a little bit of extra clay, I managed to re-attach the wrist to the hand. Thankfully.

I can assure you that I was SUPER vigilant with the other hand, as well as the feet.

Now the feet:
Again I start with a snake, flattened on the one end, the difference here is that I give the foot a bend that will later become the heel.

With a few squeezes and some pinches I get to this shape.

Again, make sure that the feet are proportional to the face (the foot should be about the same size as the face, but I tend to make them slightly smaller on my dolls, mainly because I think that it looks a little better, but you should do what ever works for you).


Once I have the toes thinned out and about the right shape, I start to give them some definition.

Unlike the fingers which are all equally big with the thumb added after, the toes are all together, and so I divide the foot into thirds.
The first of these becomes the big toe, and the other two thirds are each separated in half and each of those sections becomes the rest of the toes.


See? Easy-peasy.
To make these toes appear a little more realistic, I take a little spotter paint brush and, with the tiniest bit of mineral/baby oil, I brush in between the toes, and I also pull the separation between the big toe and the rest of them apart a little.
the last part is to draw on the nails and add a little more detail.

Here I thought that I would show you that it doesn't always come that easily, and sometimes it takes quite a while before the clay does what it is meant to (well for me anyway). The one on the left is the first foot I did, and the other is the second. As you can see, the one on the right is SOOO much better. Well I think so anyway.

Just remember that the second foot (and hand) needs to be the same as the first (the left one is baked, the right isn't).

A close up of the foot...

Ans that is that for the sculpting. Now for the fun part. The paining!

Sheesh, does this look creepy or what?!

Before I painted mine I sanded the whole lot. (well not the features of the face or the hands and feet, but you know what I mean...)
To minimize the dust and mess (and more importantly the trauma to the clay) I use wet/dry sand paper and keep the whole lot rather wet.
This method of dipping the paper and the sculpture in the water also helps to expend the life of the sandpaper.
I let this all dry and then add a touch of baby/mineral oil to sooth the clay and leave it for a few hours to absorb into the clay.
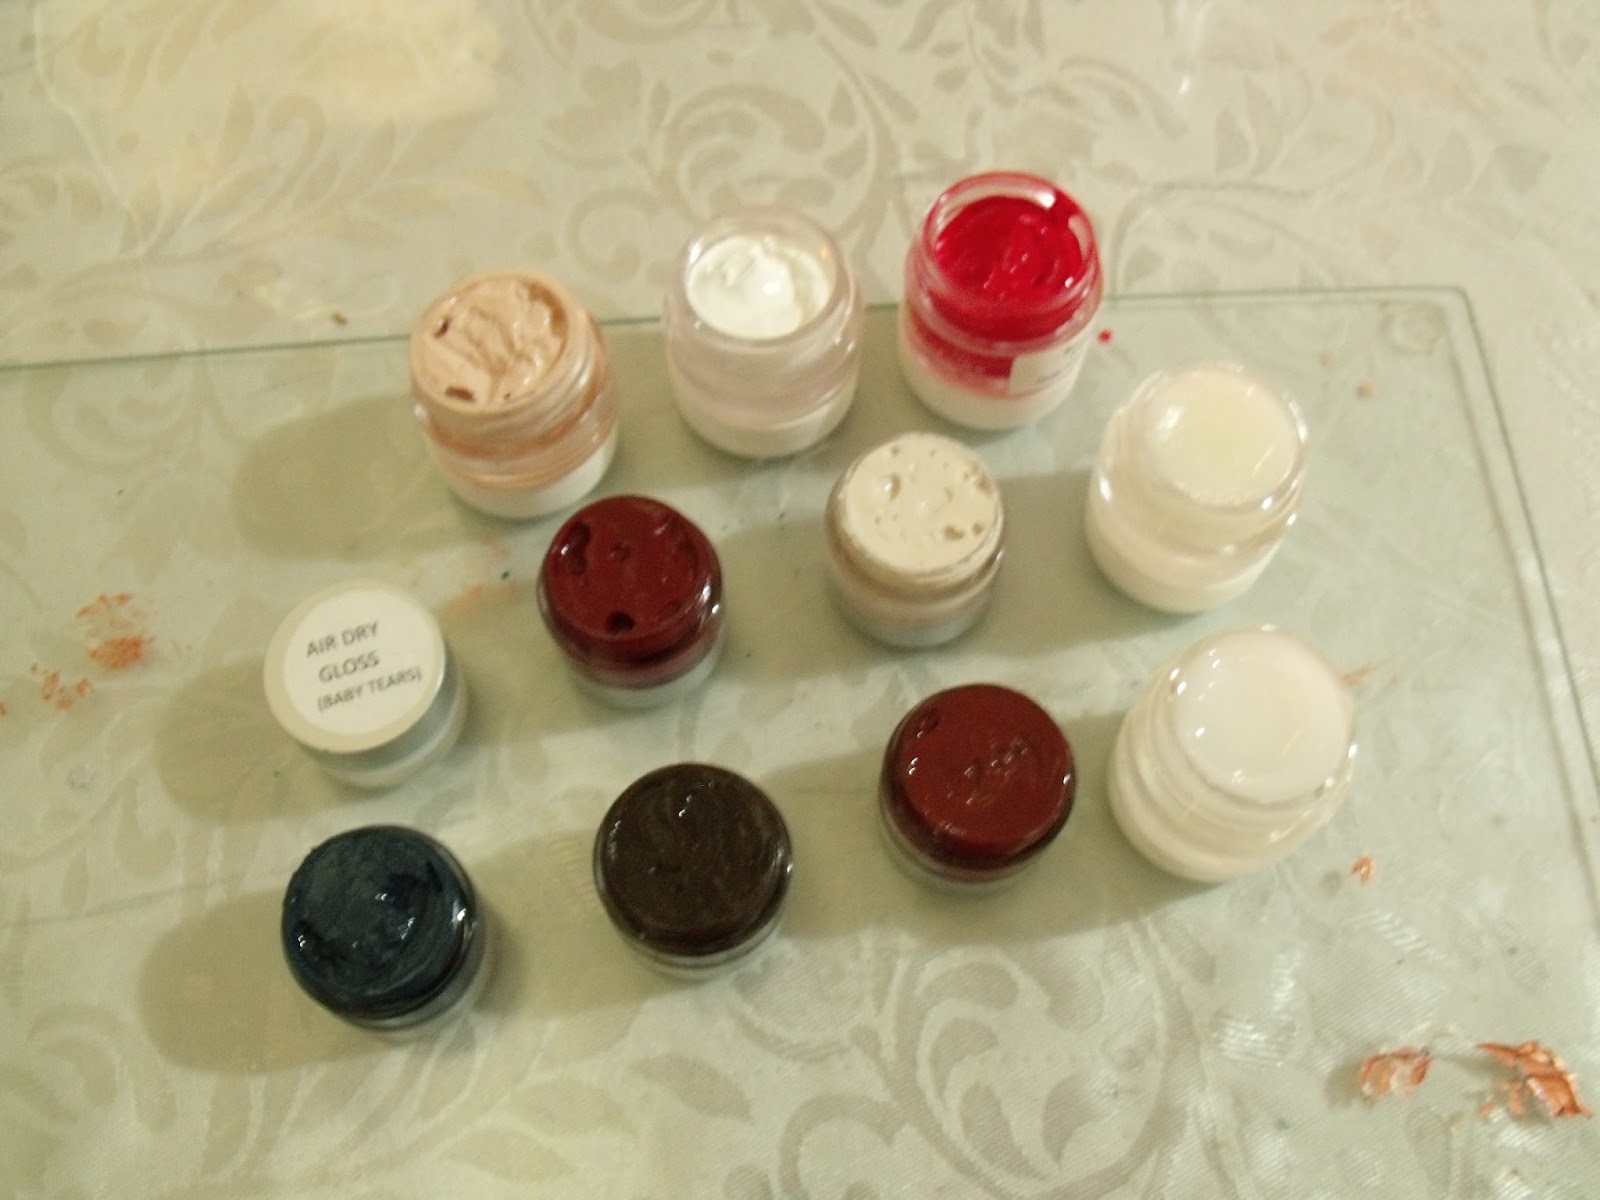
These are the Genesis paints I used. They are so amazing and I love them. Okay, yeah, they are REALLY expensive (that may just be because, you know, Australia,) but it think that it was well worth it.
(Here's where I got mine {I got the 11 jar set}. The lady, Anne, is super nice and she has the most affordable prices that I have found. I recommend going through her if you are in Aus and looking for these paints:

Here you can see the difference that a little bit of blushing (darkening the places on the body that would naturally have some darker shading ie the folds on the arms/legs below the knees etc.), I also added a little bit of a matte glaze.
Just FYI: It is NOT necessary to seal polymer clay as it is essentially plastic once baked. Also be warned that there are some sealants and varnishes that don't do well on the clay in the long run.

When I was starting out all of the videos and tutorials I watched/read all mentioned 'sealing' the finished pieces, and without any further explanations, I thought it was just part of the deal. NOT SO!
The only reason to do this (apart from wanting to) would be if you have put something on the
surface of the clay ie mica powders, paints or pastels; things like that. But be
warned: over time these can get tacky or peel or even (horror 'o horrors!) change colour.

See the difference a little blushing makes? I love it. To me blushing just brings the piece to life...

On the chest I add some of that same rosy blush colour to the nipples.

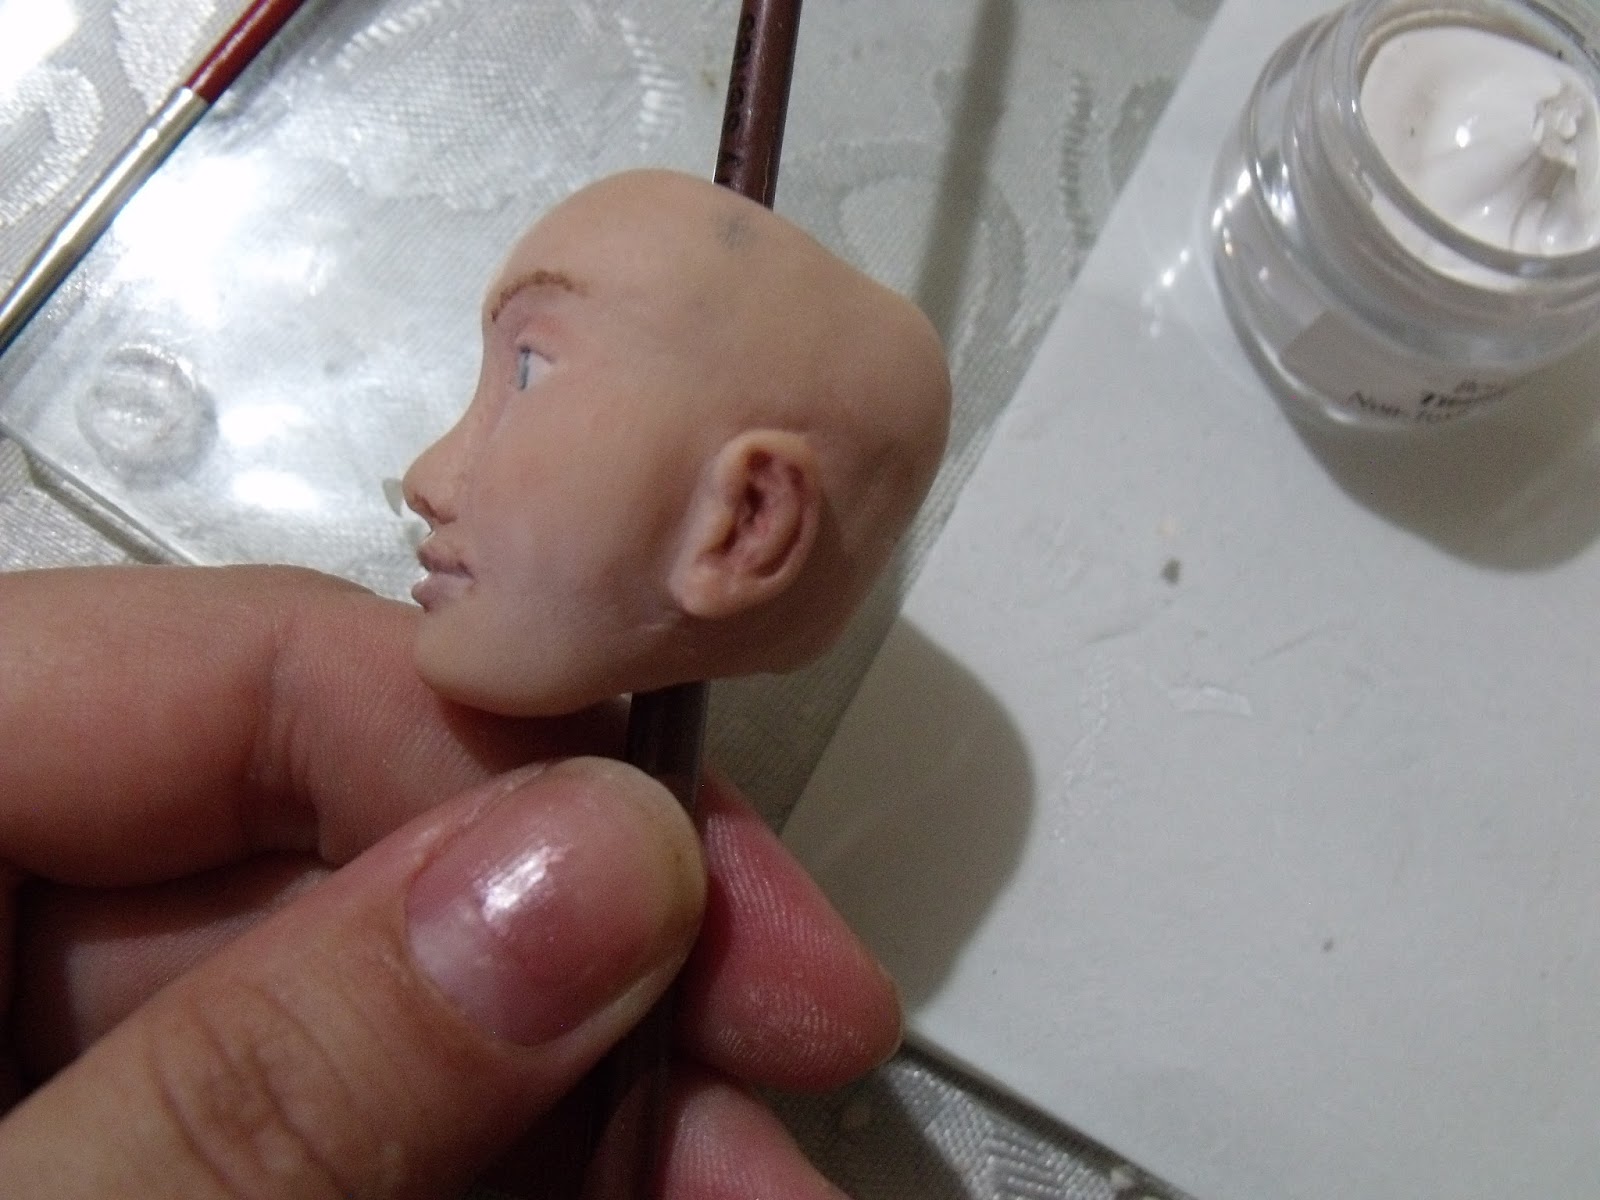
And the face: I started by using that rose colour around the eyes, on the lips and under the noes. Then I moved on to the eyes. I started with a base coat of an off white colour (more like a sort of cream colour).

When I paint on irises, I usually start off really dark and lighten it up from there.
I aslo darkened the lops a little more, but I think that I want to make this face a little less "made up" and so I ended up lightening them later...


Now to get them symmetrical...

Adding the lighter colour.

Lighter still... Adding the eyebrows also help me to see the whole picture better...


Changing the lips.
Some blush on the ears.

Finally I accentuated the eyes by adding a little bit of the brown that I used for her eyebrows to the top of the eyelids and feathering them out (like lashes). I then glossed the eyes and lips.

And there you have it.


For the hands and feet, ofcourse blush. In between the toes and fingers. The palms of the hands and the bottoms of the feet are also usually a little darker than the rest of it.

I used some of that same off white colour as I did for the eyes and drew tiny little lines on the tips of the nails and finally added just the tiniest bit of gloss to each of the nails too...
And there you have it, Painting also done!
On to the final part: The ASSEMBLY!
So it's a little hard to get photos of the process, so I will do my best to guide you through how I did it verbally:

The picture above is the same one that I used to make sure all of the limbs were proportional.

To string the doll together, I used two pieces of elastic, (one marked in red and another marked in green) these pieces of elastic cord have their ends tied together to form a loop.
You will have to play around with the length and tension that you want in order to have the joints be as stiff or as flexible as you like.
(If you look closely, you can see my new project in the top left hand corner of this photo...)

The one for the arms is pretty straight forward, hook the one side into the hook in the wrist joint, and string on in the correct order (lower arm, elbow and finally upper arm and shoulder) the arm. Things get a little tricky around the curve in the shoulder, but I found that using a bit of wire, folded in half, as a needle does the trick.
Through the torso, and down the other arm (in reverse order, obviously!)
The legs, however are a little harder to do.

I found that the easiest way for me to do it was to start at the top.
Thread the longer of the two elastic loops (red) through the head, catching the elastic on the hook in the skull cap, followed by the upper body.
(If you have done the arms already, try and feed the new loop either in front of or behind the previous elastic. I don't think that it matters which, just so long as they are still able to move freely and independently from one another...)
Now through the lower torso and out through the one leg hole.
Before going any further however, I then grabbed, with the aid of some tweezers, the string and pulled half of the remaining loop through the second hole and made sure that the two leg loops were the same length try and keep this equal as you string on the legs..
Now on to the leg (upper thigh, knee, calves) and finally catch the elastic on the ankle joint's hook. Repeat for the other side and you are all done. Now you have a BJD ready for dressing and wigging...
See; clear as mud. :P


And that's that. I hope that you found this lot at least a little informative/helpful. If you need any additional info, let me know. ( https://www.facebook.com/groups/118285765279277 )
This is where I leave you for another day.
Until next time,
ACL
PS I have been using a new communications platform, and if you are interested in contacting me with questions and/ or comments, find me instantly (messages are sent to my phone) here:
PS I have been using a new communications platform, and if you are interested in contacting me with questions and/ or comments, find me instantly (messages are sent to my phone) here:
https://reaches.me:8443/urlchat.html?guestid=6aa28459a91aad02692a9334f633919a
Its
a fairly unique platform with a huge range of uses, but I like the
chat. Alternatively, download it form the PlayStore. Search for
chatWORLD or follow this link: https://play.google.com/store/apps/details?id=com.world.chatworld&hl=en